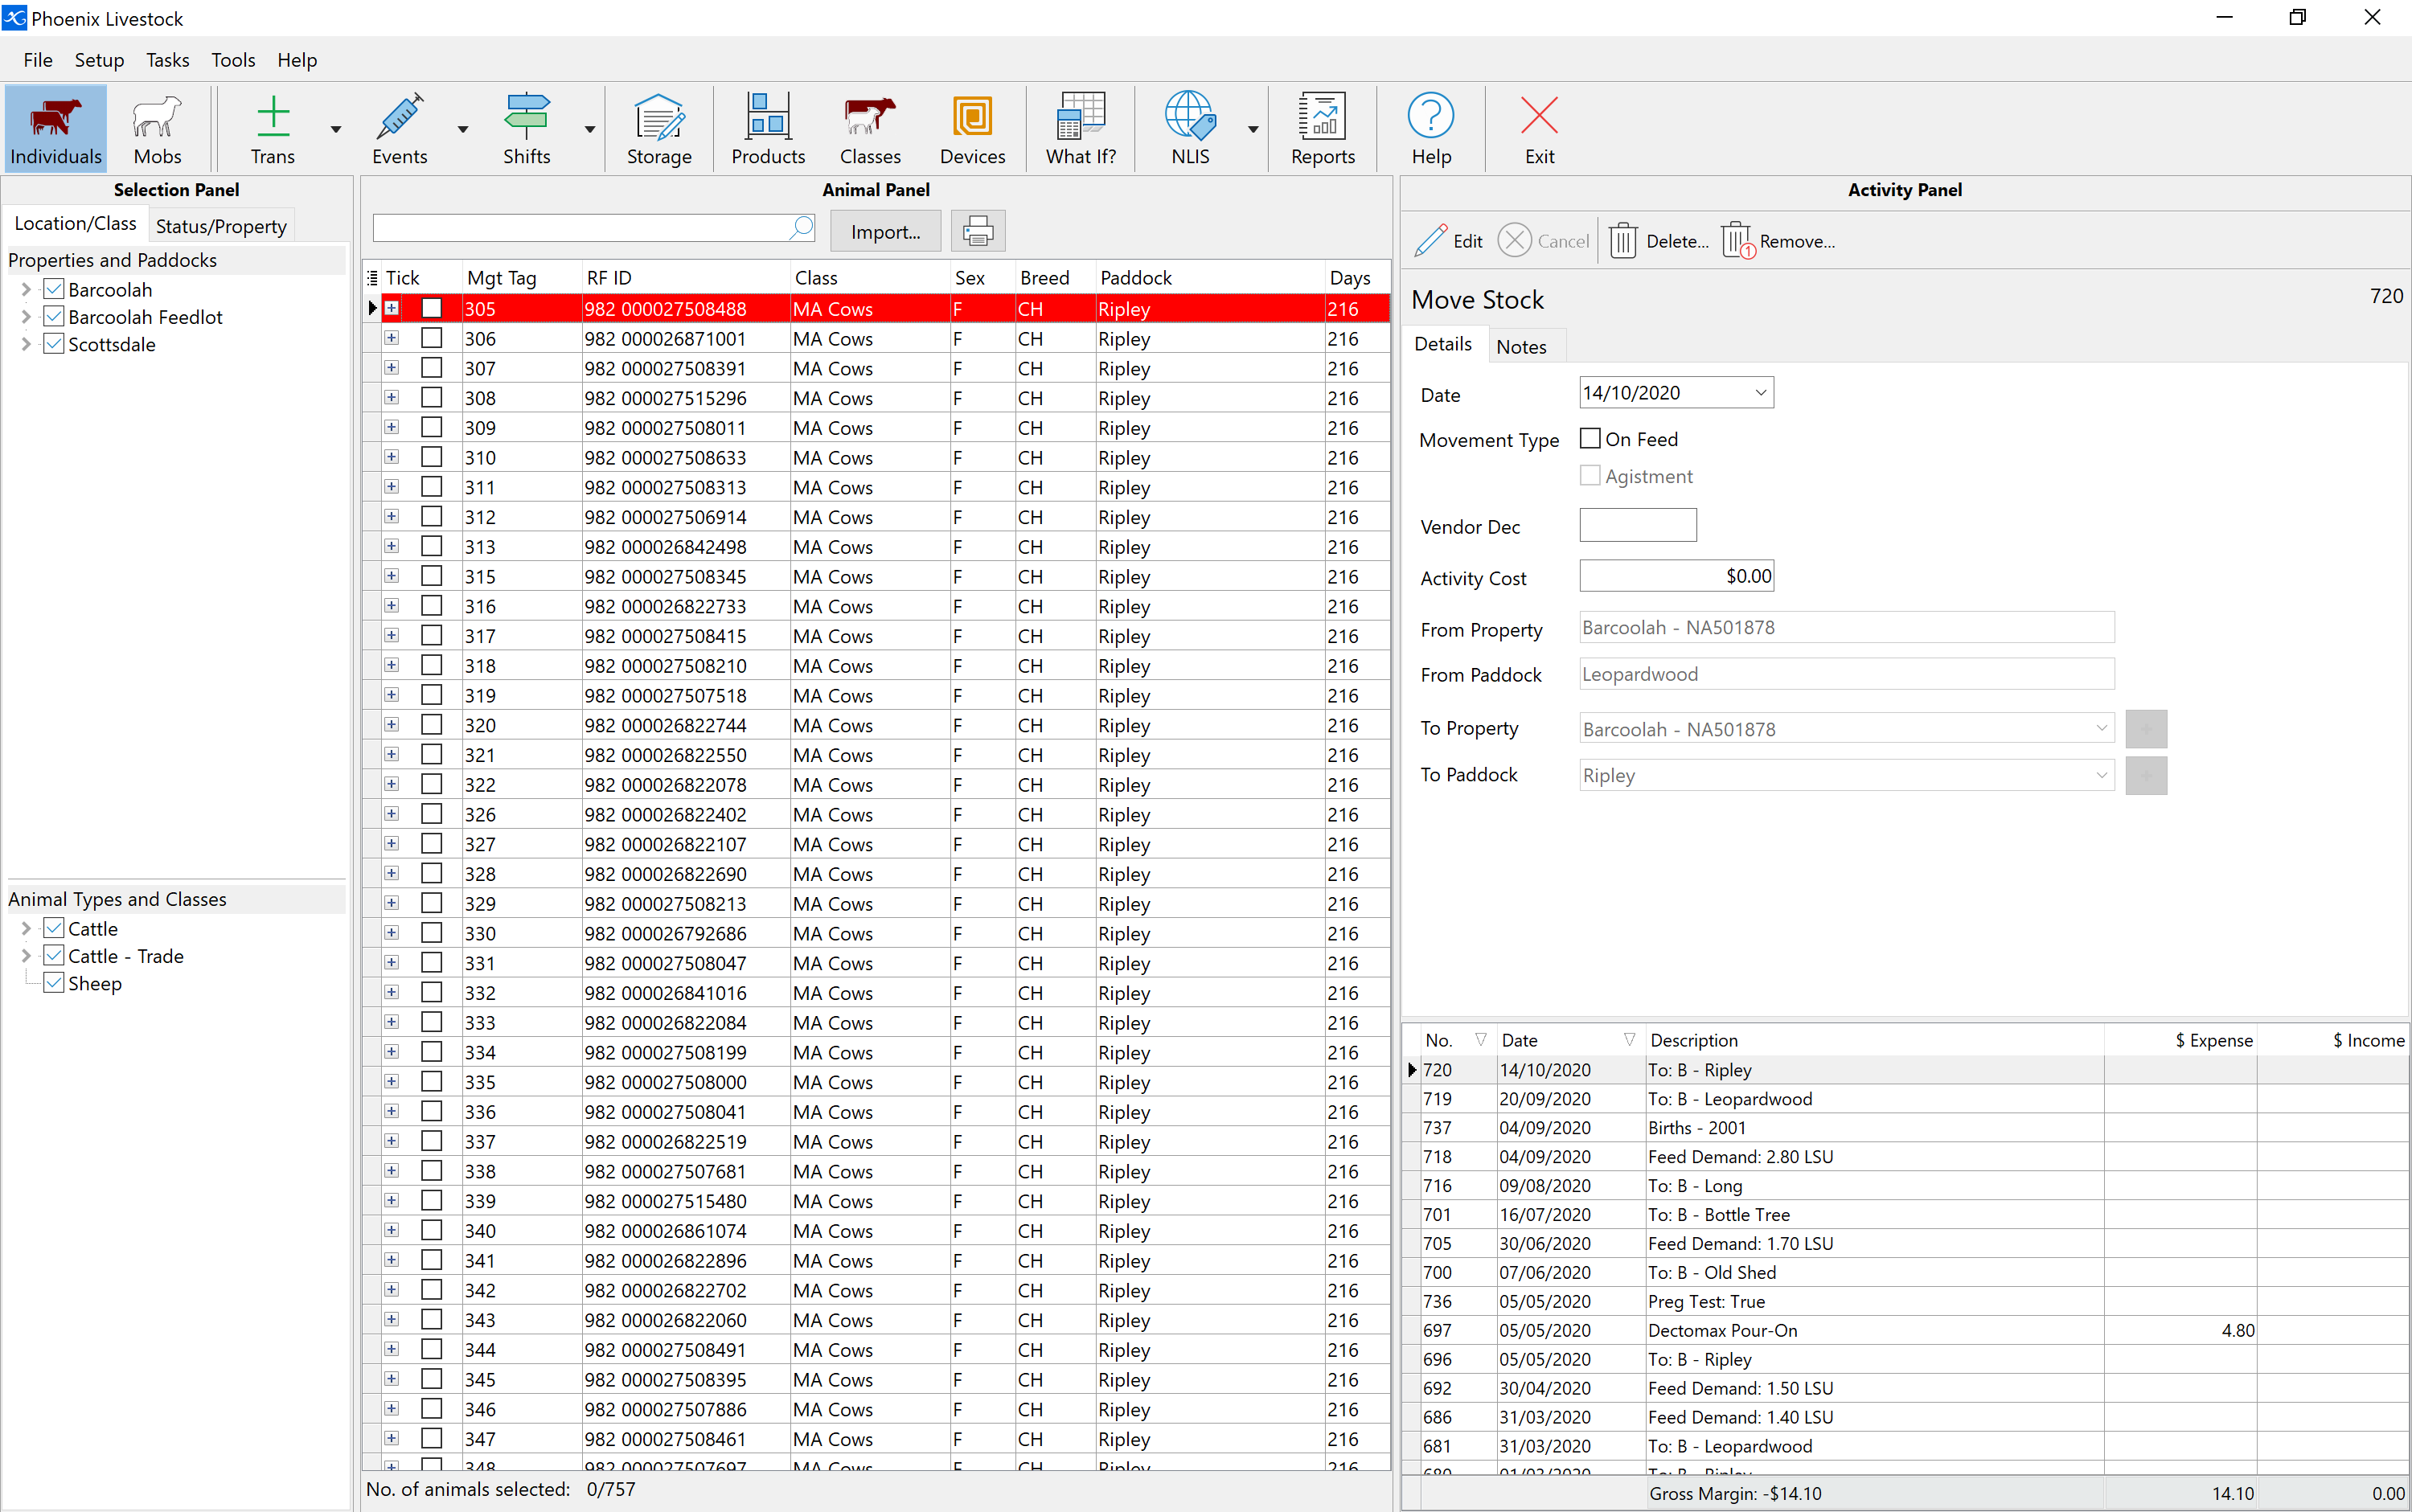
The selection made in the Selection Panel will determine the animals displayed in the Animal Panel. Each line represents an individual animal.
By default, the Animal Panel displays four columns of animal information. They are Management Tag, Class, Location and number of days in that location. The columns that display in the Animal Panel can be customised. Refer to Settings for further information on how to do this.
The animals in the Animal Panel can be sorted by any column in ascending or descending order. Click on the column heading and a black arrow will appear indicating the sort order. To reverse the order, click on the heading again and the arrow will point in the opposite direction.
The animal in focus is highlighted in red. This indicates which particular animal details are currently being displayed in the Activity Panel.
On the left hand side column is a  . If you click on the box, the details for the animal will be displayed in a box below. In the box are details such as NLISID and RFID, description, etc. . If you click on the box, the details for the animal will be displayed in a box below. In the box are details such as NLISID and RFID, description, etc.
The next column over is check boxes. Click on the box to add or remove a tick. Animals with a tick indicate they are selected and will be included in any activity that is performed while a tick remains against the animal/s. Right mouse click anywhere in the grid and you will have the option to Tick All, Untick All and Invert Ticks. This is useful when all animals in the Animal Panel are to receive the common activity.
You can also select a range of animals by holding down the Shift key and clicking on the animal at the top of the range, then click on the bottom most animal of the range. All animals between will be selected with a tick against them.
At the bottom of the Animal Panel will be displayed the total number of animals showing in the Animal Panel and the total number of animals selected (ticked).
Column order can be changed by clicking on the column heading and holding the mouse button down then dragging to the new position.
At the top of the window is a search function. This will search Management Tag, NLISID and RFID. Start typing and it will show only the animals that meet that search criteria. This will narrow with the more of the ID you type in. The search is space sensitive. Delete contents or click the Clear button to return to complete animal listing.
Next to the search function is the import function key which allows you to import a file directly into the Animal Panel, thereby selecting the animals that were in the file. This will aid in identifying animals that missed the muster or an animal that has lost its device.
|


