In various places in Phoenix Livestock there are buttons to "Import" animal records. This allows you to quickly and conveniently enter details about animals that have been collected in the field or from another source.
To import data from a file, first go to the screen in Phoenix Livestock where you want to import the data. Virtually all activity windows and some setup windows have File Import buttons.
To import a file:
•Click  .
.
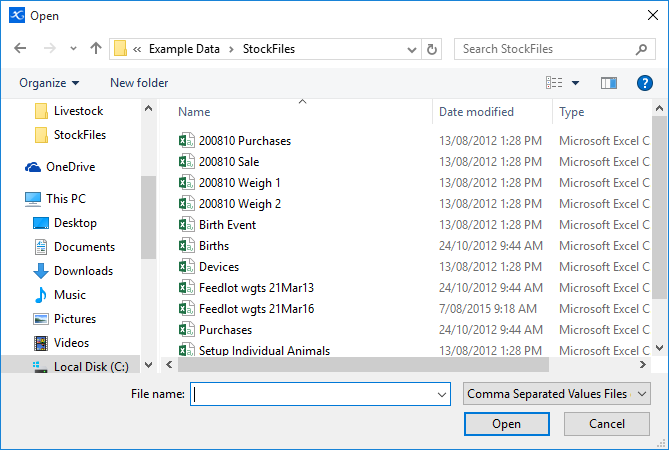
•Browse to the file containing the purchased animal’s details and click Open. Phoenix will remember from where you last imported a file and will initially look in that location. The file will need to be in .csv or .txt file format. If the file is not visible, check the File of Type selected at the bottom of the window.

•Select the file and click Open.
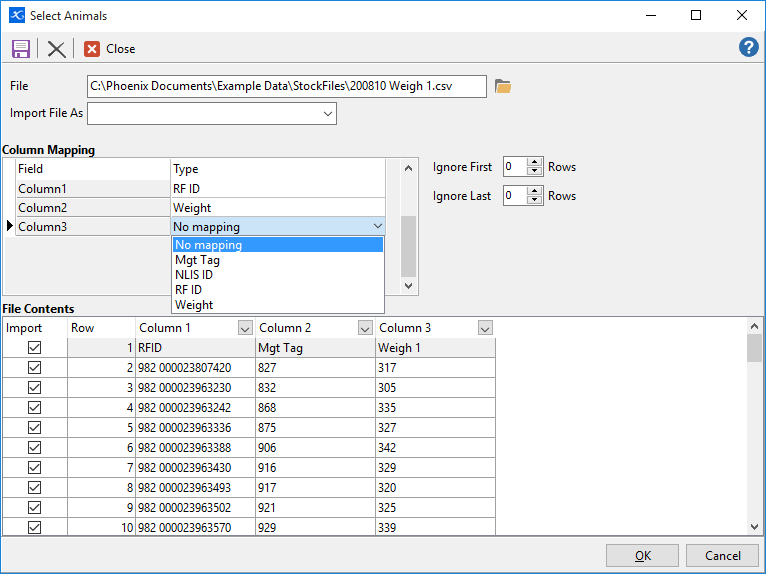
•The next window is the File Import window. The contents of the file is displayed at the bottom. As there are a multitude of file formats, you will need to map the columns in relation to their contents. The RFID and NLISID columns by default should already be mapped. If the file contains headers or other sundry information at the top, you can select the number of lines to ignore at the top and bottom of the file. Type the number of lines into the respective Ignore fields.
•In the Column Mapping section there is a list of columns. Click in the adjacent cell to be presented with a dropdown list of headings. Select the heading that defines the content of that column. Repeat for each column that is relevant. Not all columns have to be mapped.
•Select Class and Paddock from the dropdown list by clicking on the respective cell. NOTE that it will Auto-fill Down for all the animals. If any of these need to be edited, untick the Auto-fill Down for individual editing.
•If there are rows of information in the file contents that you do not want to import, untick the check box on the left hand side.
•When finished, click OK.

Save the File Mapping Format
Once you have completed the column mapping, you can save this format to be used again for regularly imported file format (weighing event). In the "Import File As" box at the top of the window, enter a name that describes the file. e.g. "ALEIS_WAND" or "XR3000", then click the Save button beside the name.
Next time you import this same type of file, you can select a previously saved File Mapping Format. Click the dropdown menu list in Import File As to choose a saved format.
