Before commencing you can set defaults for functionality. These defaults relate to:
The Work Screen of Phoenix Livestock has two forms. One is for displaying animals that are managed on an individual animal basis and the other is for mob based animal recording.
|
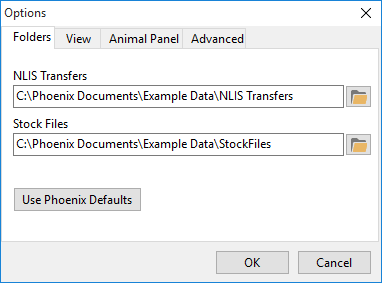
You can set the default locations for electronic files used in and created by Phoenix Livestock. NLIS File Locations Is the default location for the Files that you save for notifying the NLIS Database. To set the Default location: •Click on Tools in the Pulldown menu and select Options. •In the Folders tab, click •Browse to the folder you wish to use as the default. You can also create a new folder to act as the default location. •Once selected, click OK.
Stock Files Is a default location for the files that are used from your electronic reading equipment. To set the Stock Files: •Click on Tools in the Pulldown menu and select Options. •In the Folders tab, click •Browse to the folder you wish to use as the default. You can also create a new folder to act as the default location. •Once selected, click OK.
NB: Alternatively you can click on the Use Phoenix Defaults button. This will create an NLIS Transfers and a Stock Files default folders in your data set.
|
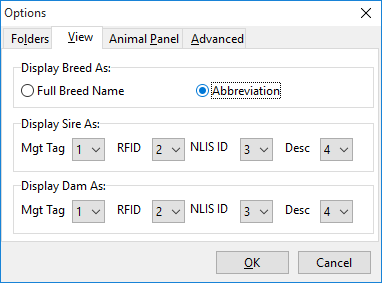
In Setup Breed you can create both full and abbreviated breed names. You can then select which name will be used throughout Phoenix Livestock. To select Breed name format: •Click on Tools in the Pulldown menu and select Options. •Then select the View Tab. •In Display Breed As, click on either Full Breed Name or Abbreviation. •Click OK.
|
You can set the priority of the identifiers to be displayed throughout Phoenix Livestock for Sire and Dam. To set the identifier priority: •Click on Tools in the Pulldown menu and select Options. •Then select the View Tab. •For both the Sire and Dam fields there are four possible identifiers shown. Against each is a drop down field containing the numbers one through to four. From these drop downs, number each identifier in the priority you would like the identifiers displayed. NB: If any given animal does not have a particular identifier then the system will display the next identifier based on the numbering system you have selected. •When finished, click OK.
|
The Animal Panel in the Work Screen by default shows four columns of information for each animal. They are: 1.Management Tag 2.RFID 3.Class 4.Sex 5.Breed 6.Feed Demand 7.Location 8.Days in Location
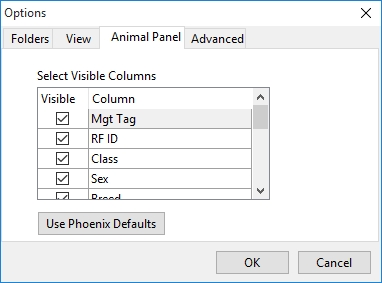
You change these columns or add more columns of information to display in the Animal Panel. Customise column selection may be to show more pertinent information for the animals or simply to utilise a larger screen format. The columns available are: •Management Tag •RFID (Radio Frequency ID) •NLIS ID (National Livestock Identification Scheme ID) •Class •Location •Days in Location •Breed •Feed Demand •Sex •Sire •Dam •Description •Status
To customise the columns in the Animal Panel: •Click on Tools in the Pulldown menu and select Options. •Click the Animal Panel tab.
•Tick the columns you wish to display. •When finished, click OK. In the Animal Panel you can re-arrange the columns. To move a column click on a column header and with the left mouse button held down, drag the header to the new position and release.
|
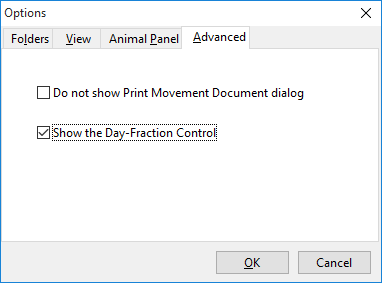
By default, all stock movements are recorded as a whole of day event i.e. just a date is recorded for when the movement occurred. However, in an intensive grazing operation this may not be detailed enough. Phoenix Livestock has the option to record movements at a portion of a day level. To enable the recording of animal movements at a "part day" level: •Click Tools on the Pulldown menu and select Options. •Select the Advanced tab.
•Tick "Show the Day-Fraction Control" and click OK. Now when you record activities that involve the moving of stock, you will have a dropdown field to specify the portion of the day the movement occurred. This is expressed as a decimal of a day from midnight of the date entered in the activity. |
You can set Phoenix to always load inactive animal history or you can specify a time period in months for Phoenix to load. You can access this setting under Tools -> Options from the Suite Screen. More Information: Modules |
©2020 AGDATA Holdings Pty Ltd trading as AGDATA Australia

 at the end of the NLIS Transfers field.