Most current model hand-held GPS units support GPX file format for data transfer to and from the unit.
To upload waypoints, routes and/or tracks to a GPS unit:
•Plug in the cable from your GPS to your computer
•Switch on the GPS
•In Phoenix Mapping, select the object/s you wish to upload to the GPS
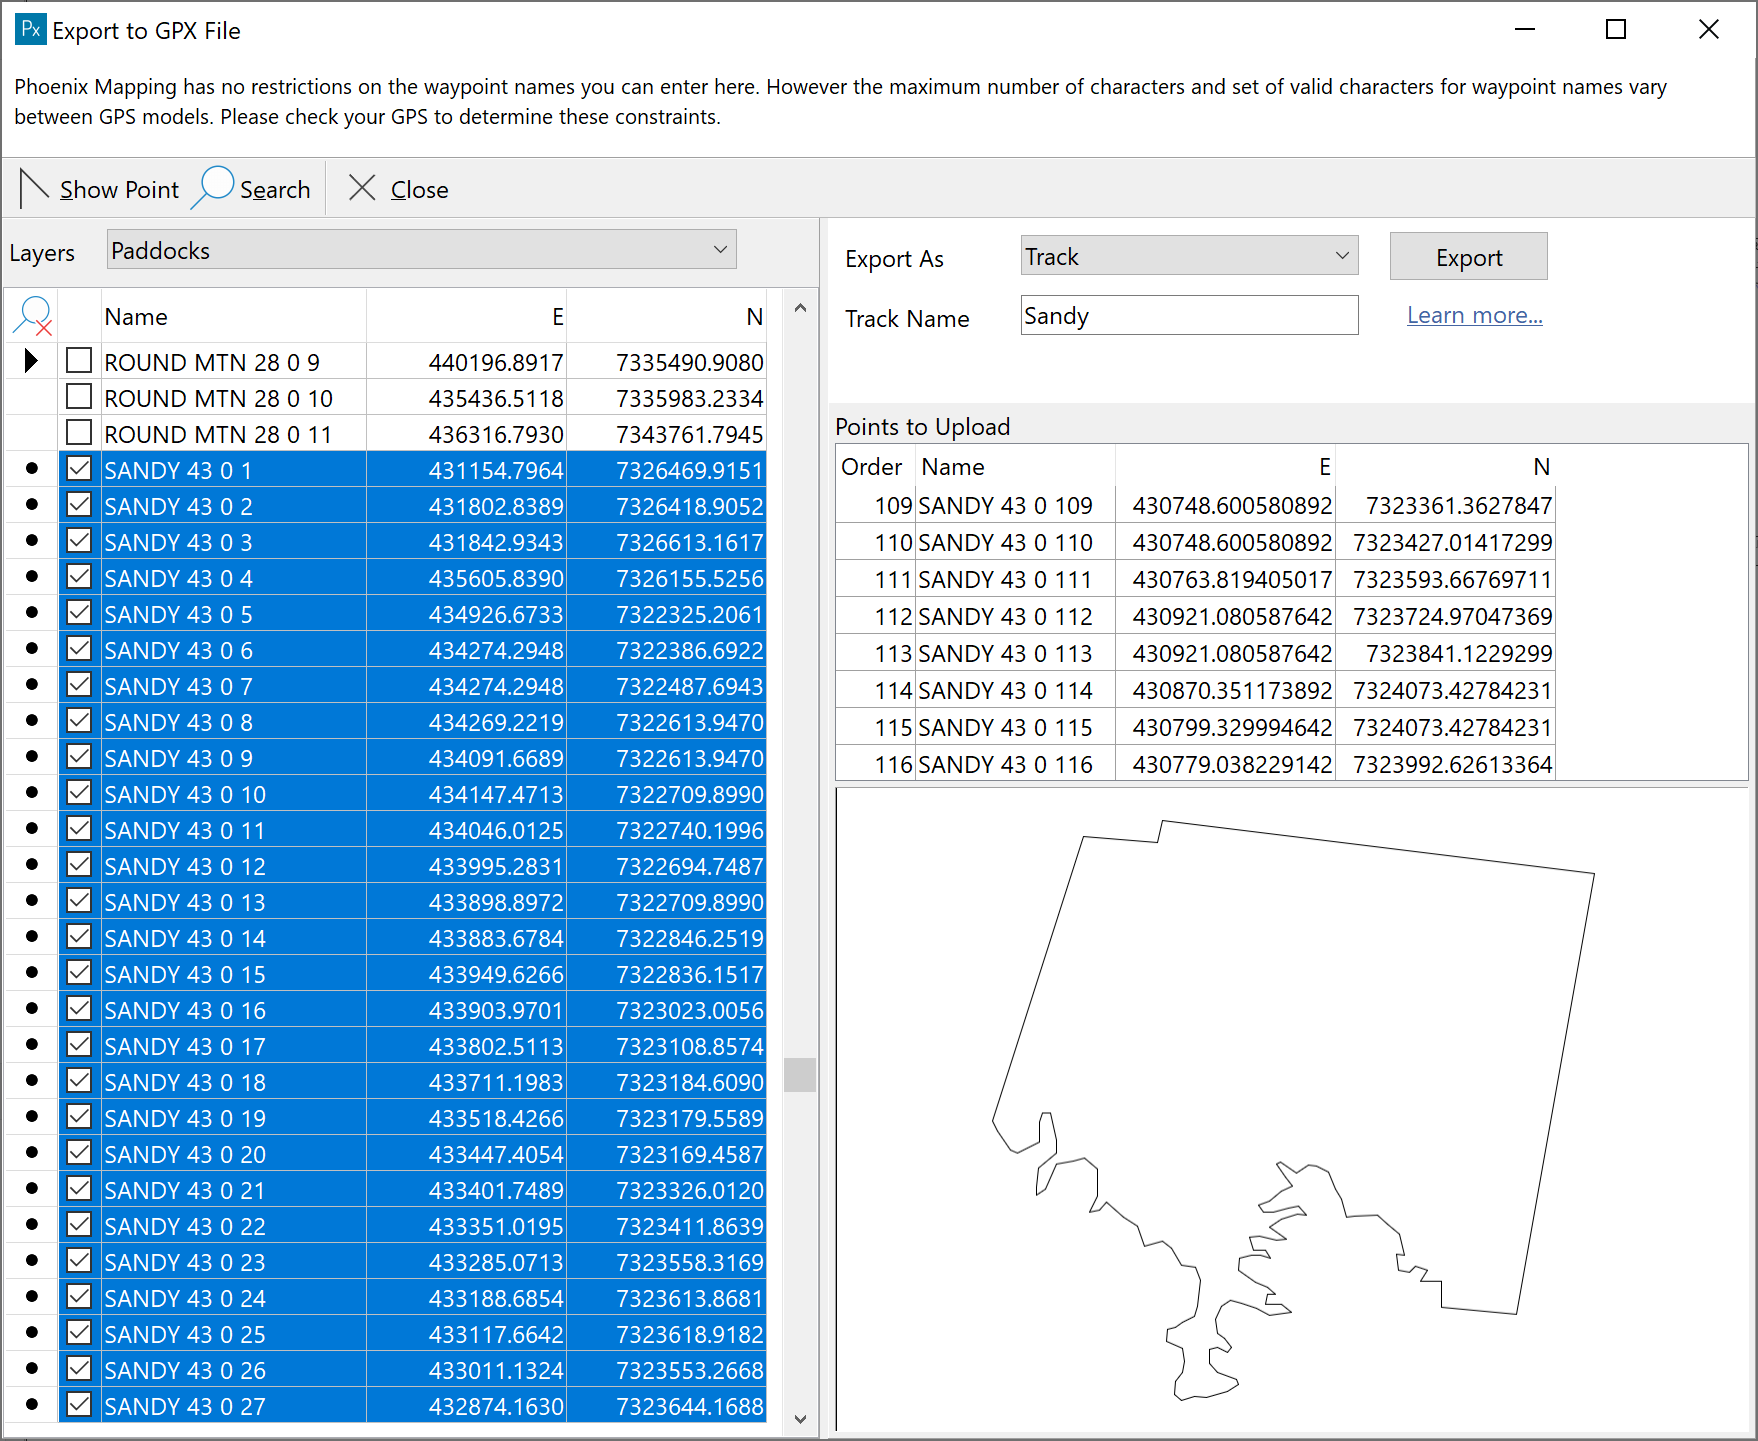
•Select GPS from the drop-down menu at the top of the screen and select Export GPX File
•By default, the waypoints that make up the object/s selected will be ticked to be included in the upload
•On the right hand side, select the format to upload from the drop-down list for Upload As (Waypoints, Route or Track)
•For Routes and Tracks you can give the route or track a name that will then appear in the GPS
•Below the list of points to upload is a Preview screen. If uploading as waypoints then they will appear as points. If you are uploading as routes or tracks then a preview of the line will be displayed
•Click Export
•Browse to the GPS unit and the folder in which the GPX file is to be saved (refer to the GPS manual for this location as it will vary per make and model if not immediately apparent)
•Click Save
•May need to unplug the GPS unit to initiate an update and for the uploaded data to appear
If the GPS unit is not physically present, then save the GPX file locally. From there you can email the file to where the GPS unit is to then through Windows Explorer copy the GPX file to the GPS unit.
Additional Functionality
Within the Export GPX File window there are a number of features that can assist in identifying and selecting waypoints to upload.
Selecting the right point/s on the map
At the top of the Upload window, select the layer the data is on. The list below will display every point on that layer. Tick each point to be uploaded. As each point is ticked, it will be added to the upload list in the right hand panel. If you are unsure of the point, tick the point and click the  button on the toolbar. The point will then flash on the map. If it is not the correct point then de-tick that point to remove it from the upload list.
Using Search to find all waypoints of an object
In the Name field, note the naming convention of the points. This is; Object text field (or Layer name if text field blank)/object id/object part id/point number.
Objects can quickly be found using the Search  function. Enter the search criteria that will help identify an object or the part of the object (i.e. a hole within a polygon).

With the list of points now filtered, right mouse click over the list and Select All to tick all points.
Re-ordering the draw order of waypoints for tracks and routes
Having selected a series of waypoints and nominated to export as either a route or track, a preview will be shown. The route or track will be drawn in the order the points were selected (ticked). If the 'draw' order is not correct you can then either unselect the points and reselect in the correct order, or click on a point in the list on the right and drag into the correct draw order position. This will automatically update the preview screen.