|
Navigation: Phoenix Suite > Phoenix Program Options Send Emails |
Scroll Prev Top Next More |
Phoenix can be configured to use a variety of emailing options.

On the Phoenix Suite screen, select
Select the Send Emails tab. By default, Phoenix Live email will be ticked.
When you send emails with the Phoenix Live option checked, they'll appear to the recipient as coming from 'Company Name via Phoenix Live'. If the recipient replies to this email, it will be sent directly to the Email Address you've set in this section. Alternatively; |


On the Phoenix Suite screen, select Select the Send Emails tab. By default, Email Client will be ticked. Any supported MAPI email programs installed on your computer will be available to select from the drop-down option.
Alternatively; |

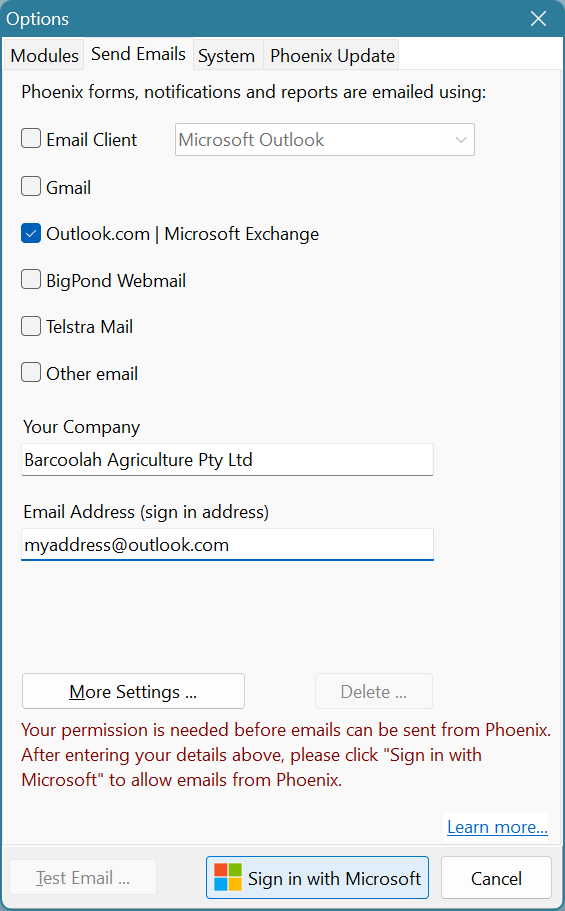
Select this option if you have a Microsoft account (including Outlook.com, Hotmail.com, Live.com or a custom personal or work/school account).
Instructions:
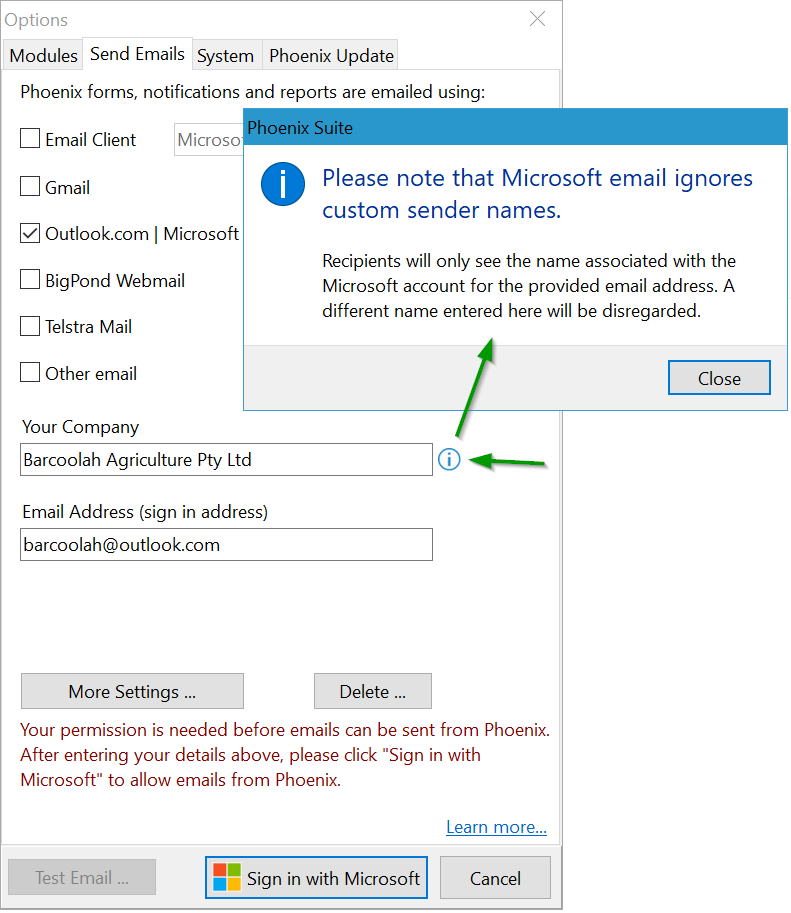
1.Tick the Outlook.com|Microsoft Exchange box. 2.Two new boxes will appear with Your Company and Email Address. 3.The details shown in the Your Company box are those from the Company information area in the set of books you are in. You can edit these details if required. 4.The Email Address box is where you type in your Microsoft address e.g. joebloggs@outlook.com 5.Click the Sign in with Microsoft button and follow the prompts granting permission.
NB: If you are using Outlook.com, click More Settings to optionally have Phoenix use an alias email address you have configured for your Microsoft account instead of using your sign-in email address.
|
If you have a Gmail account you should nominate this option. Any email that you send from Phoenix will be seen to come from your Gmail account and any delivery failure notices will be sent back to your Gmail account.
Instructions:
1.Tick the Gmail box. 2.Two new boxes will appear with Your Company and Email Address. 3.The details shown in the Your Company box are those from the Company information area in the set of books you are in. You can edit these details if required. 4.The Email Address box is where you type in your Gmail address e.g. joebloggs@gmail.com 5.Click the Sign in with Google button and follow the prompts granting permission.
Note* ensure you select the checkbox to 'Allow Phoenix to send emails on your behalf' 6.Press the 'Test Email...' button to check that the setup is working. 7.Click OK to save the details entered. |


If you have your own Bigpond email account, select this option. Any email that you send from Phoenix will be seen to come from your Bigpond account and any delivery failure notices will be sent back to your Bigpond account.
Instructions:
1.Tick the Bigpond box. 2.Three new boxes will appear with Your Company, Email Address, and Password. 3.The details shown in the Your Company box are those from the Company Information area in the set of books you are in. You can edit these details if required. 4.The Email Address box is where you type in your Bigpond address e.g. joebloggs@bigpond.com 5.The Password box is where you type in the password that you use to access your Bigpond account. 6.Press the 'Test Email...' button to check that the setup is working. 7.Click OK to save the details entered. |
Select this option if you use a different email provider and you know the details required to set up the email account. Any email that you send from Phoenix will be seen to come from the account that you nominate and any delivery failure notices will be sent back to the same account.
Instructions:
1.Tick the Other email box. 2.Three new boxes will appear with Your Company, Email Address, and Password. 3.The details shown in the Your Company box are those from the Company Information area in the set of books you are in. You can edit these details if required. 4.The Email Address box is where you type in your email address e.g. joebloggs@myisp.com.au 5.Type the password that you use to access your email account into the Password box. 6.Click the More Settings ... button. 7.Check the Outgoing mail server (SMTP), the Port Number and the Connection security settings. All of these details will be available from your Internet Service Provider. Once you have confirmed the correct details, click OK. 8.Press the Test Email ... button to check that the setup is working. 9.Click OK to save the details entered. |
You can view your Sent Items Log by going to the Phoenix Suite and selecting Data > View Logs > Sent Items Log.
*Note: the Sent Items Log only supports a web-based application, not a MAPI based application.
You will see a summary of emails sent from Phoenix. You can edit the date range by clicking the drop-down menu. You can also 'Show All Users'
Filter the To, Subject, Date Sent, Sent By and Module columns by hovering over the cell and clicking the icon that appears in the top right-hand corner. You can then build further filters by clicking the 'Customize...' button that will display once an initial filter is selected.
*Note: this is a log of emails sent only. You will not be able to view or edit emails after they are sent by Phoenix. |

©2026 AGDATA Holdings Pty Ltd trading as AGDATA Australia