WARNING: If you are going to rely on a scanned image of a legal document, we suggest for legal reasons that you keep your original.
Images can come from many sources, your image can be a scanned document, a digital photograph, a downloaded picture, etc. The attachment however must comply with the following file types:
For documents
For images
- JPG
- PNG
We also suggest (for size requirements) that it be scanned using the lowest quality resolution.
The image must be scanned or loaded onto your computer as a jpg, _v8.png or pdf file before it can be attached as an image to a transaction. This can either be done by using your scanner, digital camera or any other source which allows you to create images.
Each image can be no larger than 2.00MB in size.
As a copy of the image will be placed into your Phoenix dataset this will increase the size of your backup.
Loading the image into the transaction
1.Find or enter the transaction into the account in which you want to attach the image.
2.Click on the  button. By clicking on this button, this screen will appear
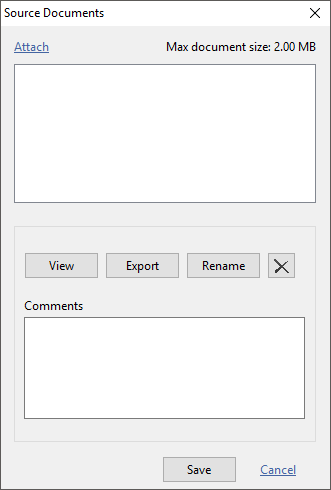
3.Click on the “Attach” button and navigate through your system to locate your image.
4.When you have found the appropriate image, click on the “Open” button to attach it to this transaction.
5.Click on the “Save” button.
6.Click on the “Close” button if you don’t want to attach another image. If you want to add in more images, click “Attach”.
IMPORTANT: When attaching an image to a transaction, a copy of the image is made into the Phoenix database. This means if you decide to delete the image from Phoenix, it does not delete the image from your computer entirely.
Adding more than one image to the same transaction
After the first image has been attached, follow the above steps to add in any additional images. The number of images that can be attached to a transaction is limitless, however each image can only be up to 2.00MB.
Use the Navigation buttons if you have more than one image attached to one transaction. They allow you to scroll through the various images.
Exporting an image after it has been attached
If you wish to export any image after it has been attached to the transaction:
1.Click on the “Attach image” button after finding the transaction.
2.Click on the “Export” button - This will take you to a File Explorer window where you can choose the location to save the image to.
3.Click the "Save" button.
4.Click on the “Close” button.
Deleting an image from a transaction
If you wish to delete an image after it has been attached to the transaction:
1.Click on the “Attach image” button after finding the transaction.
2.Click on navigation buttons (if you have more than one image) to select the image you wish to delete.
3.Click on the “Delete” button.
4.Click on the “Close” button.
5.This will delete the copy of the image that is stored under the Phoenix database ONLY.
Renaming an image
If you wish to give a new name to your file:
1. Click on the "Attach image" button after finding the transaction.
2. Click on navigation buttons (if you have more than one image) to select the image you wish to rename.
3. Click on the "Rename" button.
4. Enter the new file name.
5. Click "OK"
6. Click on the "Close" button.
Comment field
The comment field allows you to put a description to your image or images.