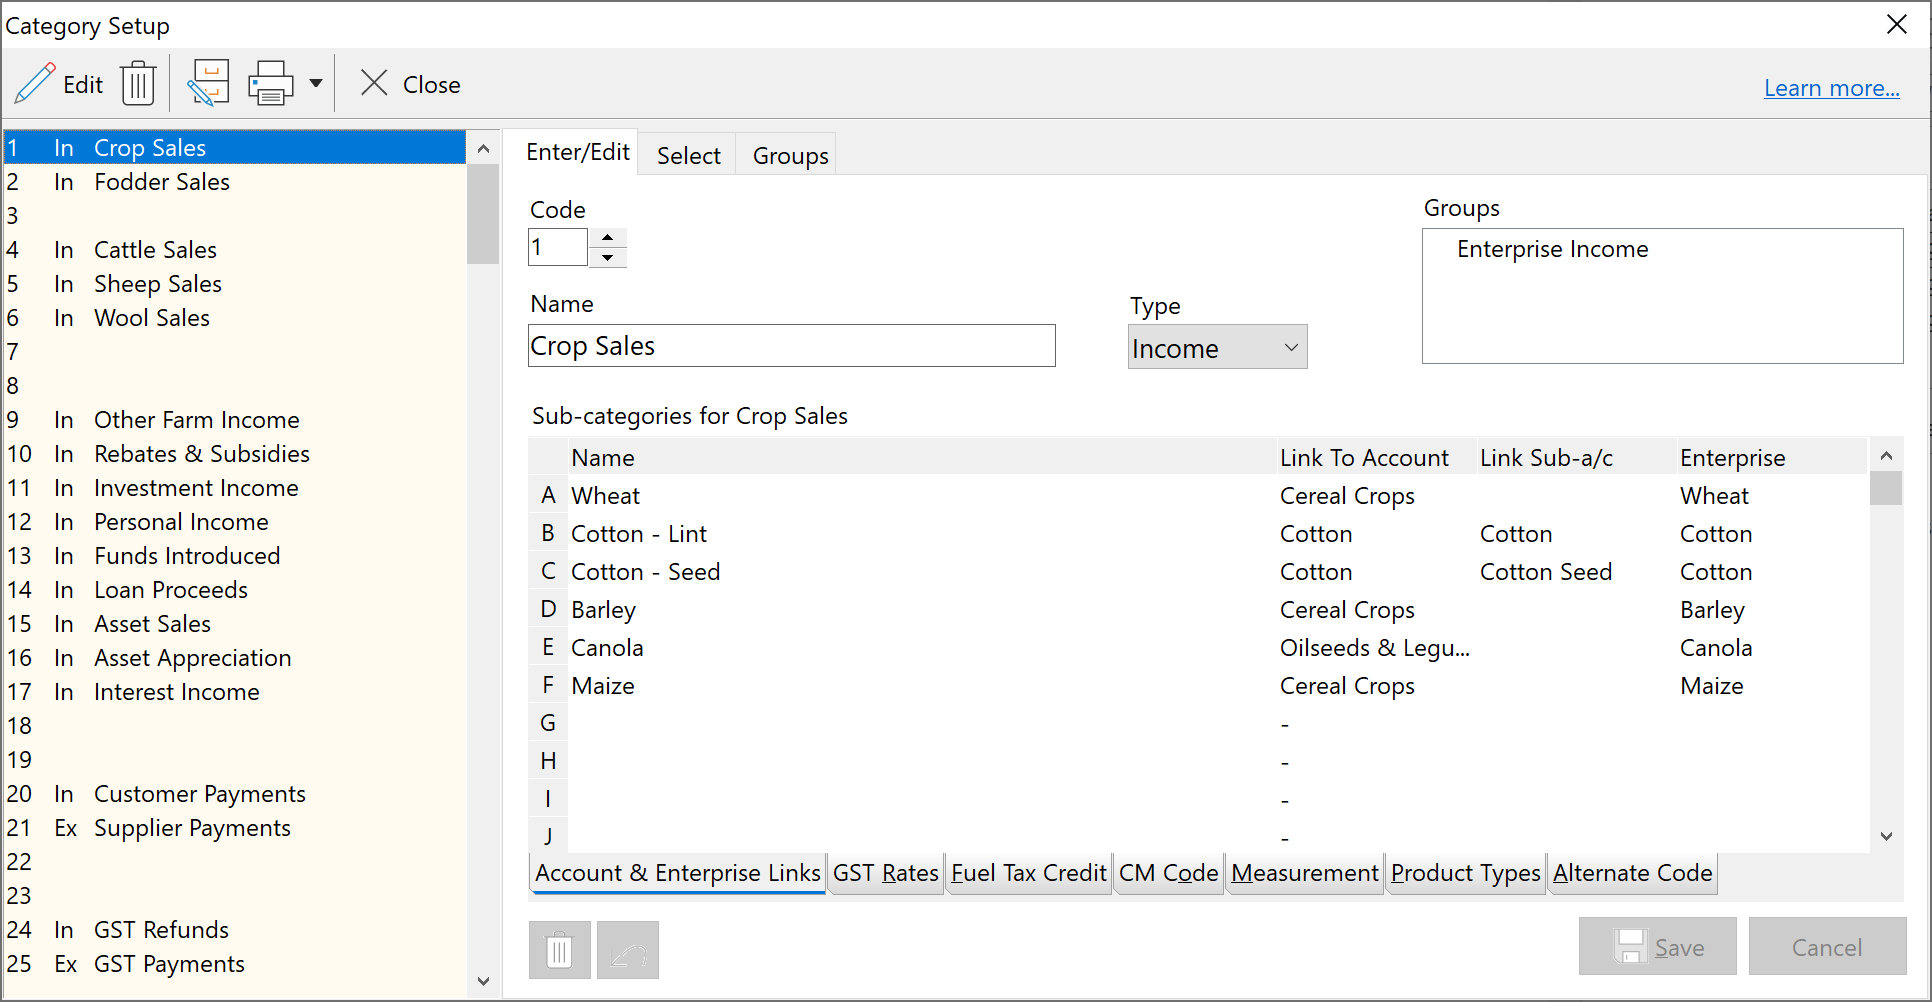
To create a new Category:
1.Click on the  button on the Toolbar and select Categories, or use the Setup menu, and select the Categories option.

2.Select a vacant number in the list of categories on the left hand side of the window, then press the Enter key to move to the right hand editing side.
3.Type in the name of the category.
4.Set the Type as an expense or an income.
5.If applicable, select the Group by clicking in the box next to the group required.
6.Type in the sub-category name for sub-category A.
7.If a link is required double click in the link to account column, select from the list the account and/or sub-account you wish to link to
8.For some sub-categories in your set of books, there would only be one Enterprise that would be appropriate. Once this Enterprise is assigned to the sub-category, then the Enterprise will be automatically allocated as transactions are entered.
9.Select the GST Rate tab. Check the GST Rate and percentage claimable amounts are correct. All categories default to GST Rate 1 and 100% Claimable when first created. If you have a category that cannot all be claimed, such as telephone for example, the change the percentage here. See also Trial Balance
10.AGDATA provides to the accounting profession a program called Phoenix Exporter. Phoenix Exporter reads transactions from the Phoenix database and exports them to various programs used in accountant’s offices. For this conversion, exporter adds an alternative code for each sub-category. The Alternate Code tab in Phoenix allows you to see the codes inserted by Exporter if it has been used, but does not allow you to edit those codes.
11.Common Mapping Codes are used in Phoenix to allow certain reports to be produces in identical format regardless of the income and expense categories on any particular set of books. This feature is a cornerstone of the Phoenix Financial Pro option of the Phoenix suite. To set CMC’s just click to the right of any sub-category, then choose an appropriate item from the list provided. See also Ratio Report.
12.As part of every transaction you have the opportunity to record a quantity. The family of units that this quantity belongs to will be available for you to choose from whenever this category is used again. If you wish to specify the family of units, use the Arrow keys to see the “Measurement” tab. Change the family of units beside each of the sub-categories. This will only change the family of units from this point on. Your previous transactions will not be changed.
| When a unit is selected for a sub-category for the first time, then this unit type becomes the default measurement unit. For example, if kilograms is selected when entering the transaction, then the sub-category will default in the future to only allow Weight measurement units. If you later decide you need to enter multiple measurement units, then there are two steps required. You must first set the Measurement type to None for the sub-category. You must also un-tick the Filter Measurements check box under Tools / Options / Advanced. See also Filter Measurements. |
13.This step is only required for your "Fuel" category or categories. Edit the details displayed under the Fuel Rebate tab. In order to produce the Fuel Rebate report, Phoenix needs to know which sub-categories relate to the purchase of fuel, and what proportion of the fuel allocated to any sub-category is fuel eligible for the rebate. See Setting Phoenix Categories for the Fuel Tax Credit for details.
14.Repeat steps 6-12 for each additional sub-category (if any).
15.Click Save
See also: GST Rates in Category Setup
