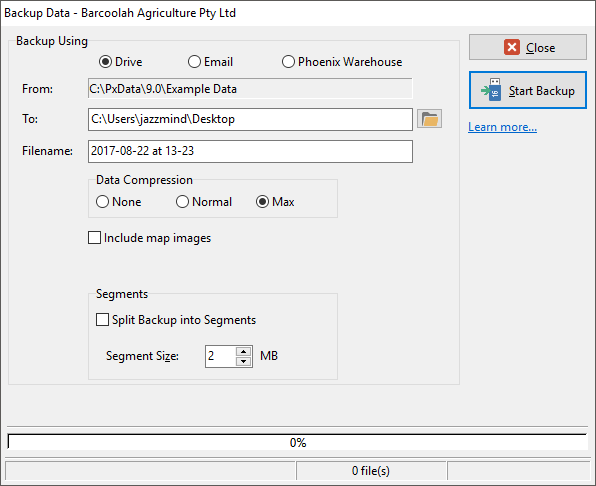
To backup to a drive such as a USB memory device or a removable hard drive:
1.Either click Data on the menu bar and then choose Backup, or, click the  button on the Toolbar.
2.A confirmation message to close all forms will be displayed, Click Yes.
3.Phoenix will ask if you want to check the data first, Click Yes to display the Check Data Integrity window
4.Click Run Checks to start the data integrity check, and when it has finished click Close to then display the Backup Data window

5.Select your backup location by using the  Browse button. The browse button gives you access to all of the normal locations that you may choose for your backup media.
6.The default backup filename is built from the date and time. This format of date and time is chosen so that if you have multiple backups stored on the same device, they will sort from the oldest to the newest. You may change the filename here if you choose. This screen does not show you the filename extension used by Phoenix, but the program automatically adds the extension behind the scenes. It is important that you do not change the extension using Windows Explorer, My Computer or any other program. If you change the extension, Phoenix will not recognise the file as a backup, and will not be able to restore it.
7.Data compression is available at three levels. The program defaults to maximum compression. This is the best choice for modern high speed computers. Normal compression may be a better choice for older and slower computers, while no compression is made available should it ever be needed to help diagnose a backup problem.
8.There is an option to split the backup into segments. This may be useful if you need to email a large backup using an internet connection that has email size limitations. Split backup files need to be saved in a single folder to be restored.
9.Click Start Backup.
See Also:
