Browse has its own button on the Toolbar, as well as being accessible from the Tasks menu. Browse is a quick and easy means of checking and editing the entries you have made in Phoenix. Browse is also excellent for obtaining a list of transactions for a particular account and period.
The Selection bar is the key to searching and retrieving the information you wish to look at. You can filter the data by selecting tick boxes within Account, Period, Enterprise and Category. The Print button on the Function bar prints the transactions listed on the screen.
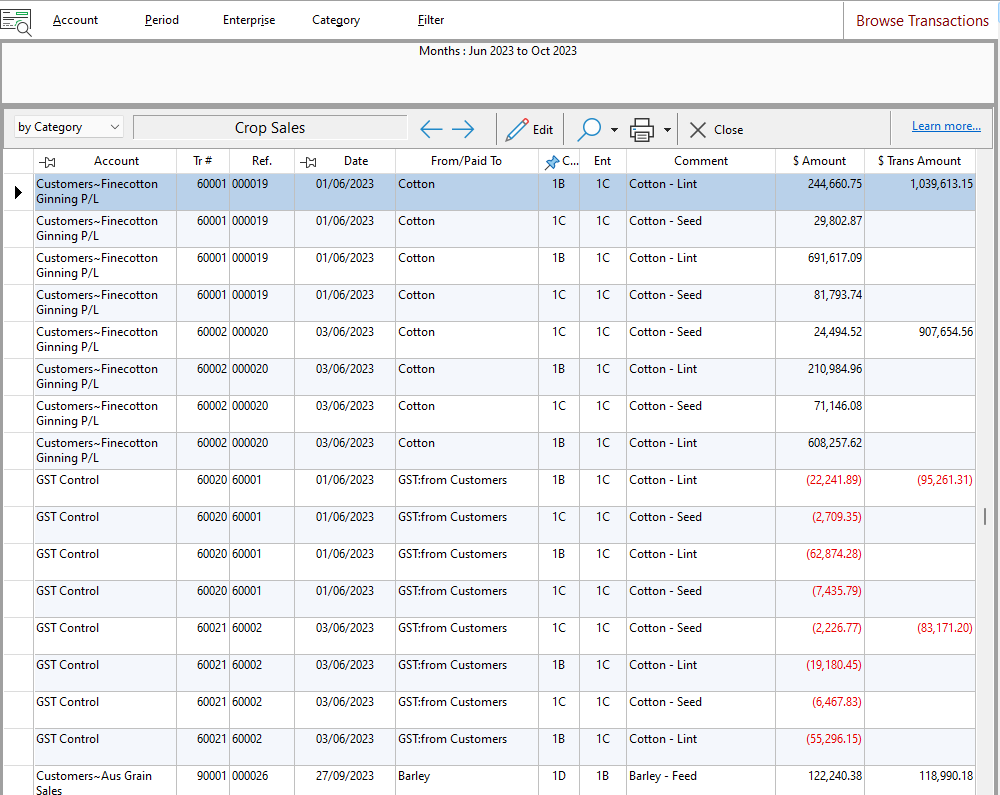
The example shows records from the perspective of a Reconciled account (the Rabo All In One Account) in the default state:

Transactions are grouped and sorted in the window according to the current sort selection. The sort selection by default is the Category / Sub-category. Note that the column label has a key displayed above the list. You can choose to sort or group by Account, Date or Category / Sub-category by clicking on their label. Whichever column label has the key displayed indicates the current sort selection.
The way the list is Grouped and Sorted is displayed in a field above the list labels. In the above example, sorted by Category. The current Category is Crop Sales.
The Prev and Next buttons on the function bar allows you to display the previous or next group according to the current selection. In the above example, Next would display transactions for the next Category. An alternative method of displaying a different group of transactions is to make a selection from the Selection bar. If the list is currently grouped by Category, click on Category in the Selection bar, and click on the Category that you want to display. (Don’t remove the tick in the categories box as this would remove that category from the browse list). Then click OK.
Ticking the All box disables grouping and sorting. With the All box checked, the list includes all transactions according to the selections made in the Selection bar.
|
The Find  function is provided to help find particular individual transactions. function is provided to help find particular individual transactions.

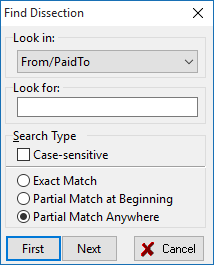
Click the Find button (binoculars) to reveal the Find Dissection Window. Fill out the Find Dissection Window as required and Phoenix highlights the first transaction in the list that conforms to your requirement. The up and down buttons beside the find button moves up and down the list to other transactions that conform to your requirements. The Up button always locates the first matching transaction, while the down button finds the next matching transaction.
|
One of the most powerful options of the Browse function is the ability to edit transactions from the list. This is done by highlighting a transaction, then clicking the Edit button on the Function bar to begin editing the selected transaction. An example of where this can be useful: If a series of transactions was entered and it’s later discovered that the transactions were posted to the wrong category, you can use this browse function to edit them accordingly.
Once you select the Edit function, the program takes you to the Enter Transactions window (see Editing Transactions).
|
A print function is provided to print the displayed list. This is particularly useful when used in conjunction with the Search option.
|
The Filter option on the selection bar provides the most powerful utility for listing specific transactions. See Transaction Search for details on using the filter window.
Tick the All box to display all transactions that meet the search criteria and the other selections made in the selection bar. The  icon in the top left hand corner of the filter results turns the search filter on or off . icon in the top left hand corner of the filter results turns the search filter on or off .
|


 function is provided to help find particular individual transactions.
