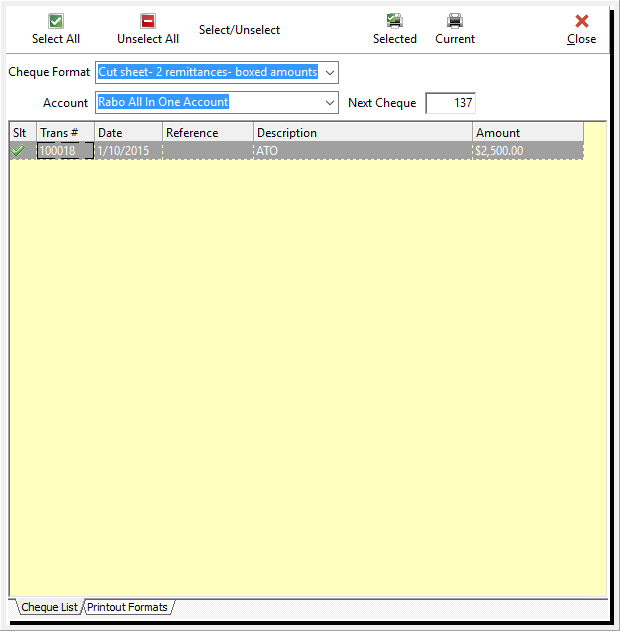
1.Select the Print Cheques option from the Tasks pull down menu.

2.Choose a cheque format from the list of pre-set cheque formats already set up in Phoenix , Your printing agency will tell you which format they have used to print your blank cheques.
N.B. - It is important to note that if you are using single cut sheets that only one cheque per sheet is to be printed on the sheet. Ensure that you make your printing agency aware of this requirement.
3.Choose the account from which the cheques are to be printed. Do this by selecting the pull down arrow to the right of the Accounts field and selecting the account from which cheques have been drawn.
4.Choose the cheques to be printed. The options available from the function bar at the top of the Print Cheque screen allow you to:
a.Select all - This option automatically includes all cheques in the payment.
b.Un-select all – This unticks all the cheques allowing each cheque to be manually chosen.
c.Select/Un-select - This toggles the current setting that is if there is a cross beside the transaction it will change to a tick and vice versa. The Cheques with a tick are included in the payment.
5.Choose the  icon to print the selected (ticked) cheques. Ensure that the blank cheques are loaded in the printer correctly.
Additional Options:
a.Print only the current cheque  . Choosing this option prints just the cheque currently highlighted in the list. If this is your desired option select the icon and again ensure that the blank cheques are correctly placed in the printer.
Note: Transactions are included for printing if the transaction type is cheque and its reference number (cheque number) is blank. Once the cheque has been printed, the cheque number is automatically inserted as the reference number for the transaction.