|
Navigation: Financial > Configuring Financials > Setting up Accounts > Set up Customers & Suppliers > Set up Invoice and Statement Layouts Options |
Scroll Prev Top Next More |
The Options area is on the left hand side of the document design window below the Layouts list. This allows you to configure certain details regarding the document.
Under the General tab you can set the precision with which the data is displayed in the body of an invoice. The Quantity, GST and price per unit may each, independently be configured to display as whole units (or dollars) or with 1 to 4 decimal places. You are also able to choose whether to print dissection comments when using the edited invoice layout. |
In some layouts, the Footer can print an invoice message. The message can be selected from a list of predefined messages or can be typed in under this tab. |
On the footer of some layouts, there is space to display information about how your customer can pay you. You may select Cheque, Credit Card or Direct Deposit. If you tick the Cheque box, the footer will display the mail address for cheque payments. This mail address is taken from the Company Information screen. If you tick the Credit Card box, space will be provided on the remittance slip for your customer to write their credit card number, security code, name and expiry date. You should also tick the particular cards that you accept in this case. If you tick Direct Deposit, the remittance slip will display your bank account number and BSB number. To do this, you will need to select the account that you will use for these deposits and ensure that the correct account numbers are recorded in that account. |
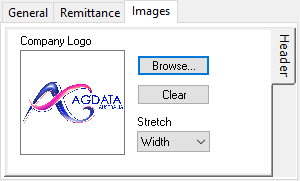
This is where you will specify the logo to be printed or the image for a remittance advise if you have selected a header or footer format that allows for an image. In this context, an image can be any picture, e.g. your company logo or a picture of the text that you want to print on the remittance slip of an invoice. Your image should be in_v8.png format. If you only have the image in another format, you should open the image in a picture editing program (such as Paint) and save the image as a_v8.png format.
Note the shape of the image box and compare this with the shape of your image. Phoenix can stretch your image to fit the size of the box available. There are 4 stretch options: Width: Fills the width of the image box. The image is stretched vertically and horizontally at the same rate. The resulting image may be taller than the space allowed and may overwrite or be overwritten by some text on the header. Height: Fills the height of the image box. The image is stretched vertically and horizontally at the same rate. The resulting image may be wider than the space allowed, and may overwrite or be overwritten by some text on the header. Both: Fills the image box in both directions. This may result in an image that is not proportional to the original image. Inside: Fits the logo at a size that will fill the width or the height of the box, whichever fills first.
NOTE: The Width, Height and Inside options will preserve the aspect ratio of the image (the ratio of the height to the width of the image) so that the shape of the image will look right. The Both option will distort the image if necessary to fit the shape of the box. To create an image file for the remittance, you could use your word processor to print a layout that you like then using a scanner, scan the page and save the result as a _v8.png file. |
©2020 AGDATA Holdings Pty Ltd trading as AGDATA Australia

