•Launch Phoenix Mapping from the Desktop Shortcut
•Click on the Map button on the Toolbar 
•Select the project you wish to open, then click on the Open Selected Project button 
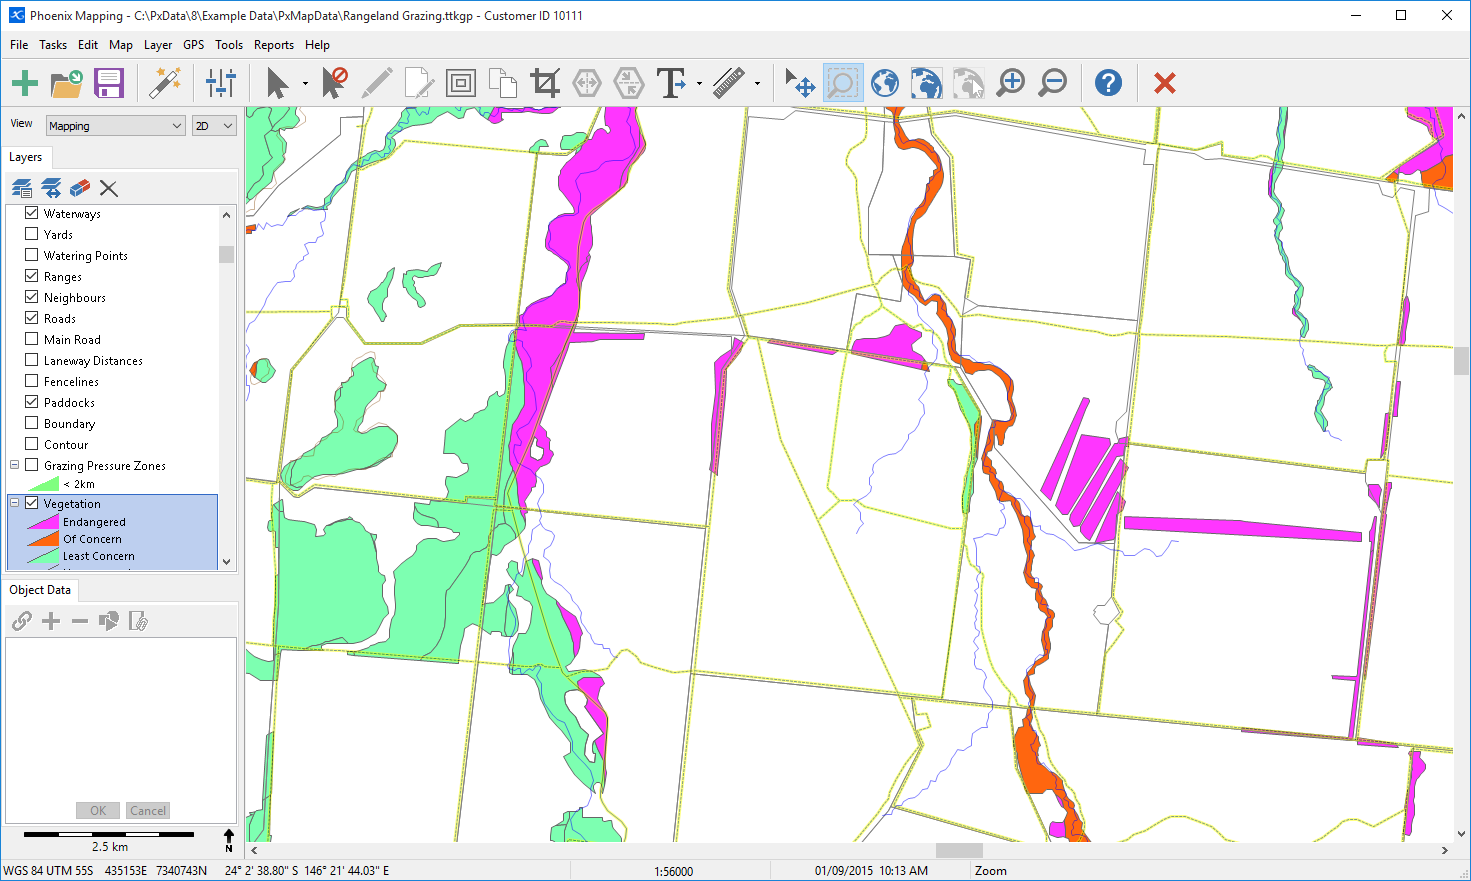
You will be presented with the Map main screen.

The screen is divided into five main areas. At the very top of the screen is the window title bar that will display the name of the Licensed User. Moving down the work screen, the user is presented with seven pulldown menu options. To activate the pulldown menus, either select the desired menu by clicking on it with the mouse button or hold down the Alt key and press the key for the underlined character.
Situated below the pulldown menus is the Toolbar. The Tool Bar contains a row of buttons that are activated by clicking the desired icon with the mouse. The Toolbar contains the program’s most commonly used options and is designed for quick access to the commands. It is important to note however that all functions available on the Toolbar are also available from the pulldown menus.
The area located immediately below the Toolbar, is the area upon which all mapping activities will appear. On the left hand side is the Layer Manager for the mapping project. The remainder of the screen is dedicated to the map itself.