This section relates to legacy Aged Trading accounts that were used in Version 5 of Phoenix and earlier. See Legacy Aged Trading Accounts |
Before you can print statements for a particular group of customers, you must first age those accounts. See Age Customer Accounts.
Statements should be printed regularly according to the terms applicable to your customers. For your weekly, fortnightly and monthly customers, you should print statements each week, fortnight or month respectively.
To print Customer Statements:
1.Select Tasks in the menu bar, select Aged Customer Tasks an select Print Statements, to display the Print Customer Statements dialogue:
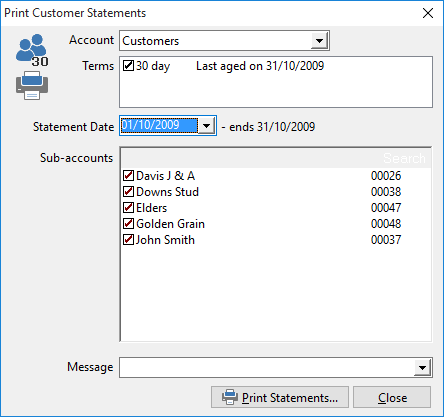
2.If you have more than one set of customer accounts, at the Account field choose the customer account to be printed.
3.In the Terms field, Phoenix displays the account terms that exist for all the sub-accounts of the chosen customer account. Choose the account term you wish to print by clicking the desired term. The selected term is marked with a tick. You can print only one term at a time.
4.Phoenix displays the most recent statement for the Account and Terms selected in the Statement Date field. You can select and print an earlier statement period if you wish.
5.Phoenix lists all the sub-accounts with the selected Term and Statement Date in the Sub-accounts list of the dialogue. Phoenix automatically ticks all sub-accounts that you have already chosen to have statements printed. (In Account and Card File Set Up, you can choose whether a statement is to be printed for each and every account.) You can modify the sub-accounts to be included or excluded now if you wish.
6.A pre-defined message can be selected for printing on all the statements. Choose the message using the Message field. This list is set up in customer messaging. You are given an opportunity to modify the message later before the statements are printed if the message is not exactly as you would like it.
7.Click the Print Statements button to display the Statement Print dialogue.
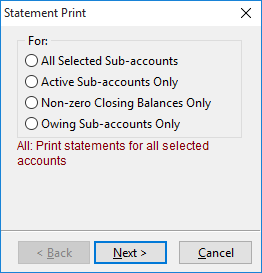
8.Using the Statement Print wizard, you choose whether to include sub-accounts that have balances of zero.
Choose Active Sub-accounts Only if you do want to include any statements with a $0.00 balance when the statement has had one or more entries. Obviously the sum total of these entries will have brought the balance for the customer sub-account back to 0.
Choose Non-zero Closing Balances Only if you don’t want to print a statement with a zero balance under any circumstances.
Choose Owing Sub-accounts Only if you don’t want to print statements for Customer accounts that are in credit.
9.Click the Next button of the Statement Print wizard to view and optionally modify the Payment Due date which will be printed on every statement.
10.Click the Next button of the Statement Print wizard to enter or edit a message to be printed on every statement.
11.Click the Finish button to the print the statements.