There are a number of invoice and statement options available. Phoenix provides several pre-formatted layouts, and the user is able to configure a number of others from the components available.
Select Invoice or Statement from the Setup menu to open the Invoice Setup window.
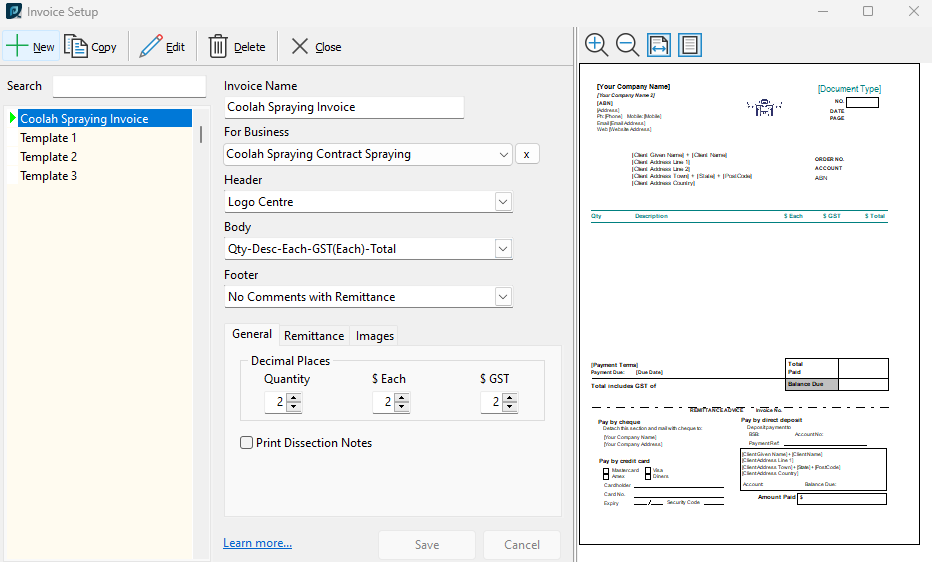
Scroll through the available layouts in the main list. The preview on the right hand side will show each layout. Existing templates can be used as is or they can be used as a base by selecting the  button. This will create a duplicate of the selected template which can then be edited. The duplicate layout will need to be named before it can be saved.
Alternatively, to create a completely layout, click the  button. To edit an existing layout click the
  button.
To assign an Additional Business to a template, click the drop-down menu under the heading For Business. To add or edit your Primary or Additional Business, see Company Information.
The indicator on the left of the list will show red for pre-defined template layouts that you cannot edit and green for user defined layouts that you have created, and can edit or delete as required.
A layout consists of a Header, Body and Footer, and a number of options depending on the components selected:
The header is the top part of the document. It consists of your company identification, a logo if required, an address panel for the recipient and document identification. There are a number of different headers available, choose one that suits your requirement. Some headers are designed to be printed on letterhead where the logo and company name, address and contact details are already on the paper. Others are designed for plain paper where all of the identification information has to be printed with the document.
If you choose a Header format which has a logo box, the Images tab in the Options area is where you can select your logo. Only .jpeg images should be used.
|
The body of the document is where the document is itemised out. There are a number of body designs available. These designs vary in the way that GST is shown in the case of an invoice and in the order of the information across the page.
For invoices, regardless of the body chosen, the number of decimal places used for the quantity, GST and price per unit can be selected by the user. Select this in the General tab on the Options area of the invoice design window.
|
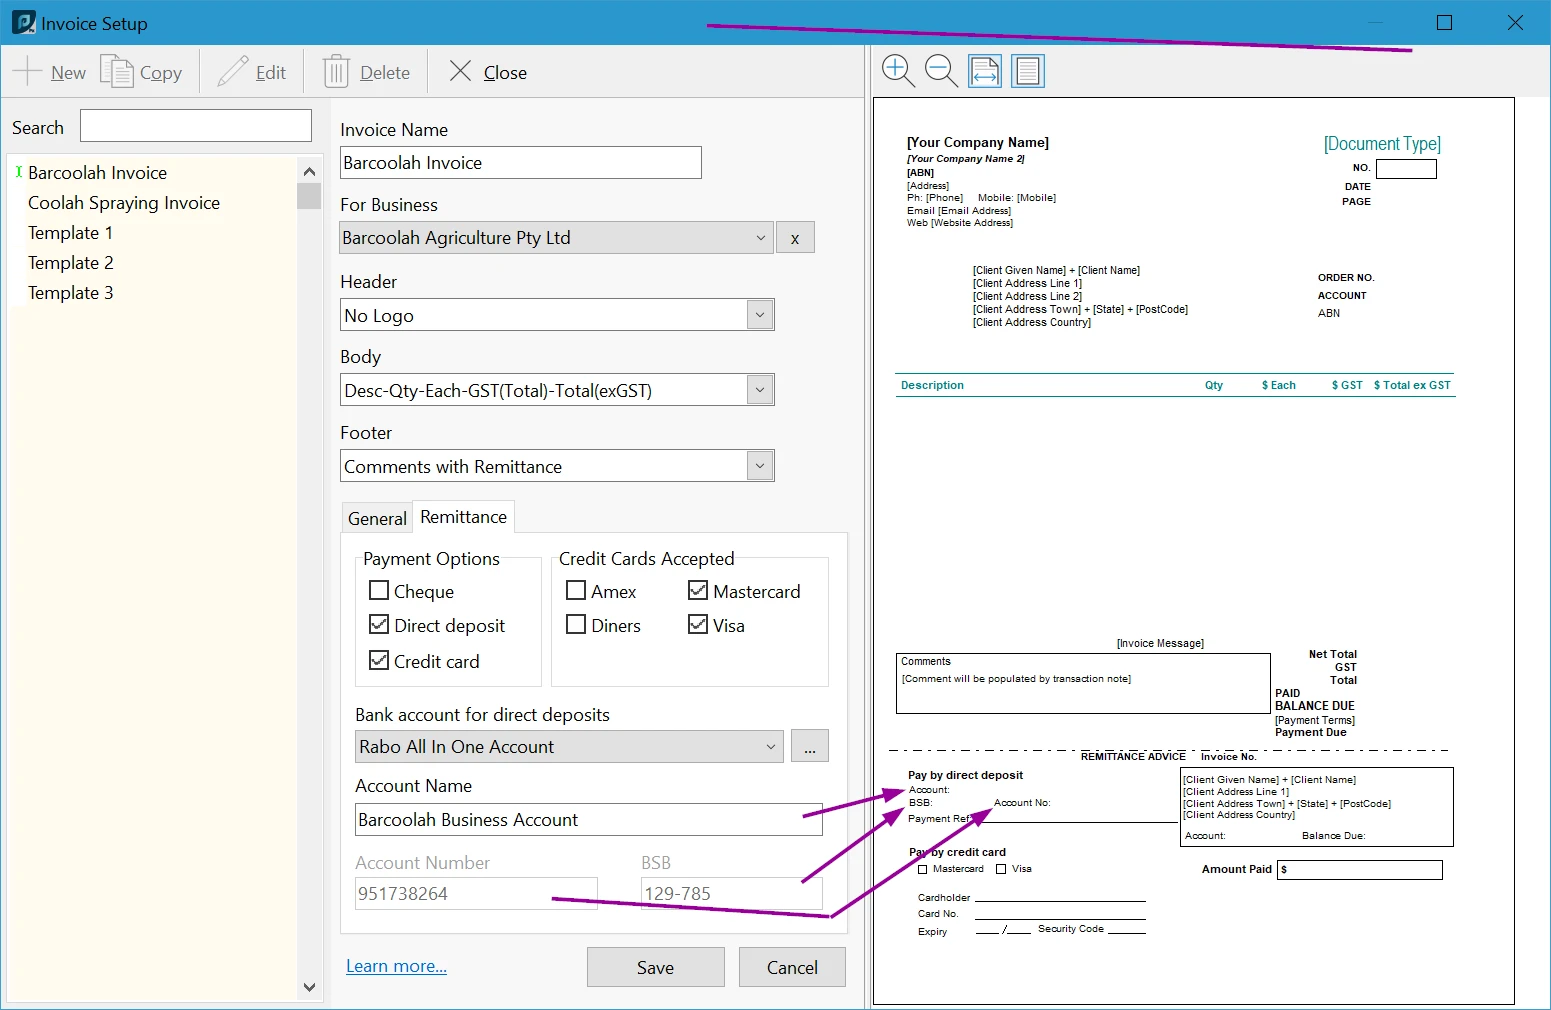
The footer of the document includes the total amount due for the invoice or the current account position and the remittance information. There are options providing information about how the recipient should pay the account. Credit Card details and Direct Deposit information can be provided.
The footer may also include a transaction note (from the attached note on the transaction), an invoice message and the recipient’s name, address and account number.
Some footer designs allow for an image. The footer image allows you the flexibility to print and scan your own footer with whatever information and layout that you see fit. If you choose a footer format which has an image box, then the Images tab in the Options area is where you can select your image.
|
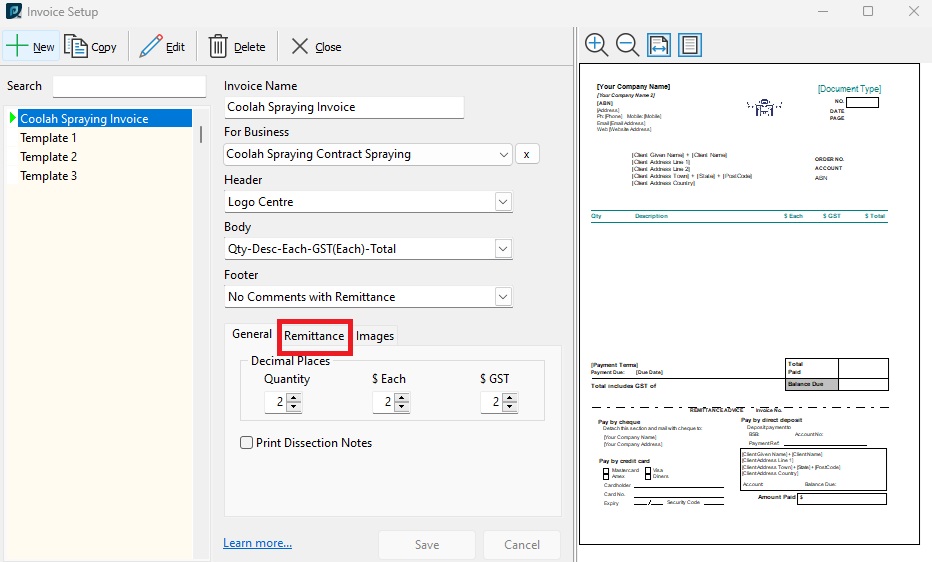
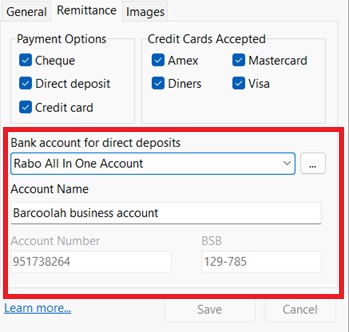
The remittance section is located within the footer settings.
You can choose the payment options you offer to customers, eg. cheque, direct deposit or credit card. If direct debit is offered as a payment option this is where you specify the account that will display on the invoice for customers to make payment to. You can enter any name into the Account Name field, however, the bank account details will feed through from details entered for that account in the Account Setup window.
|
Important: Once you have created a layout to your requirements you then have to tell Phoenix on which Accounts and/or Sub-accounts to use the new layout. See Setup Customer Accounts and/or Setup Supplier Accounts.
See also: Invoice and Statement Layout Options
Company Information
Additional Business
