You can apply a label to any object on the map. These labels can contain information such as Text (name), Area, Perimeter, Length, custom fields ,etc. You can set the default formatting of labels before or after objects have been drawn.
•Select the layer in the layer list. •Click the Layer Properties
Label
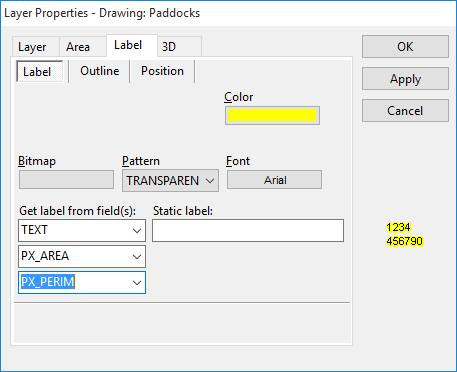
Colour: Select the colour of the labels. Bitmap: Allows you to use a custom label format. Click to browse to the location where you have the image saved. Pattern: From the drop down list you can select a background pattern for the label. Font: The font used on the label. Get Label From Field(s): This identifies from where in Object Data the label contents will be sourced. It is suggested to leave as TEXT. If you select a second or third source in the drop down box fields below then the information will appear as two or three lines on the label. Static Label: If all objects on the layer are to have the same single text label then enter the text here. This replaces the use of the Get Label From Field(s) function. Unless there is a specific need it is advised not use this function.
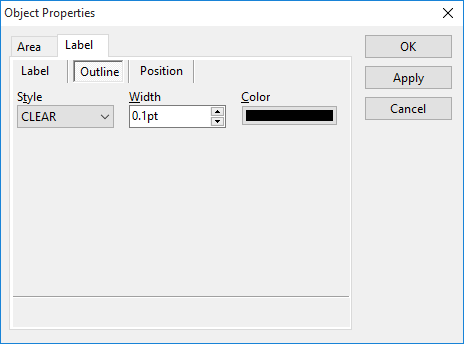
Outline
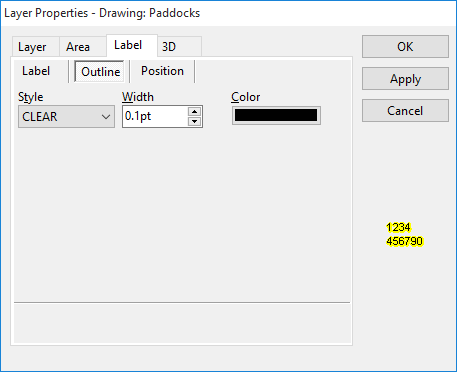
Style: From the drop down list, select the style of the outline of the label. Width: Toggle up or down to set the width of the outline. Colour: Select the colour of the outline for the label.
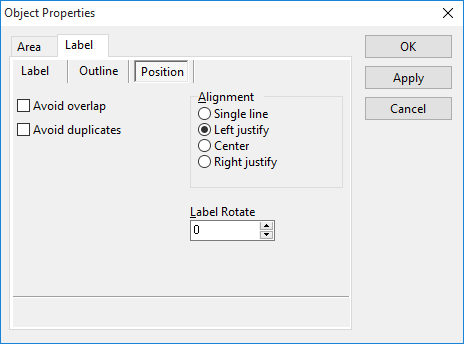
Position
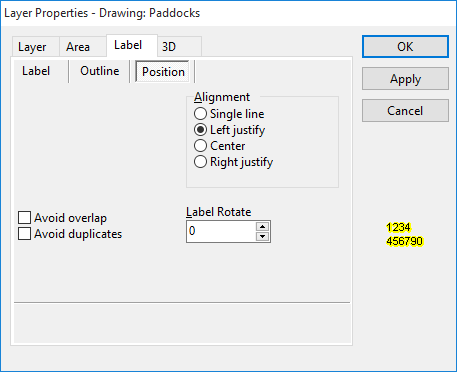
Position: Is the default position in relation to the object the label will be applied. Alignment: How the contents of the label will be formatted. Avoid Overlap: Tick if you wish to avoid labels overlapping on the map. Avoid Duplicates: Tick to avoid the labels duplicating on the map. Label Rotate: The rotation of the label. |
To edit the appearance of labels: •Select the layer in the layer list. •Select the Object/s on the layer for which you wish to edit the labels. You can select multiple objects by holding down the Ctrl key and pressing the A key to select ALL objects on the layer or right mouse click and click Select All. You can also hold down the Ctrl key and left mouse click on each object separately to select a group of individual objects. Selected objects will be highlighted in red. • •Select the Label tab.
Label
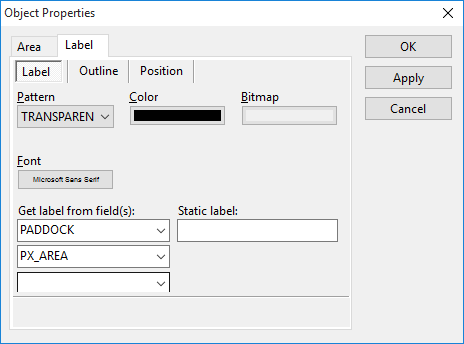
Pattern: From the drop down list you can select a background pattern for the label. Colour: Select the colour of the labels. Bitmap: Allows you to use a custom label format. Click to browse to the location where you have the image saved. Font: The font used on the label. Get Label From Field(s): This identifies from where in Object Data the label contents will be sourced. It is suggested to leave as TEXT. If you select a second or third source in the drop down box fields below then the information will appear as two or three lines on the label. Static Label: Instead of sourcing the label data from Object Data fields instead, text can be entered directly in this field. Not suggested for normal use.
Outline
Style: From the drop down list, select the style of the outline of the label. Width: Toggle up or down to set the width of the outline. Colour: Select the colour of the outline for the label.
Position
Avoid Overlap: Tick if you wish to avoid labels overlapping on the map. Avoid Duplicates: Tick to avoid the labels duplicating on the map. Alignment: How the contents of the label will be formatted. Label Rotate: The rotation of the label.
Positioning Labels on the Map You can move the position of labels on the map. To move a label: • •Left mouse click on a label and hold the button down. With the mouse, drag the cursor to where you want to relocate the label and release the left mouse button. •If you want to reset the label to it’s original position, right mouse click over the top of the label and click Send Label Home or right mouse click over the object and click Bring Label Home.
NB: You can also bring multiple labels home in the one action. Select the required objects by holding down the Ctrl key and pressing the A key to select ALL objects on the layer or right mouse click and click Select All. You can also hold down the Ctrl key and left mouse click on the objects separately to select a group of objects. Selected objects will be highlighted in red. Then follow the same steps outlined above.
Hiding Labels Selective labels can be turned off or temporarily hidden. • •In Object Data, click
Alternatively, all labels on a layer can be hidden by: •Select the layer in the layer list. •Click Layer Properties •Tick/untick Show Labels.
Label Auto Sizing When zooming, the size of labels (and symbol), by default, remain in proportion to the project scale. Minimum and maximum fonts can be set along with the ability to have labels hide once the zoom gets beyond the minimum specified font size. For further information refer to Label/Symbol Zoom. |
©2020 AGDATA Holdings Pty Ltd trading as AGDATA Australia

 button then the Label tab.



 to hide the label and
  to show the label again.