1.Click the  button on the Toolbar, select Customers from the Sales menu or press F5 on the keyboard.
2.From the Selection bar, select Customer to reveal your list of accounts/sub-accounts. Choose the account/sub-account you wish to work with and click OK.
3.Phoenix defaults to the current month. To enter a transaction in the next month, click on the Change Month drop-down arrow to the right of New and select the next month. Highlight your choice and select OK. See also Open New Month.
4.Click New to display the Invoice Entry window.
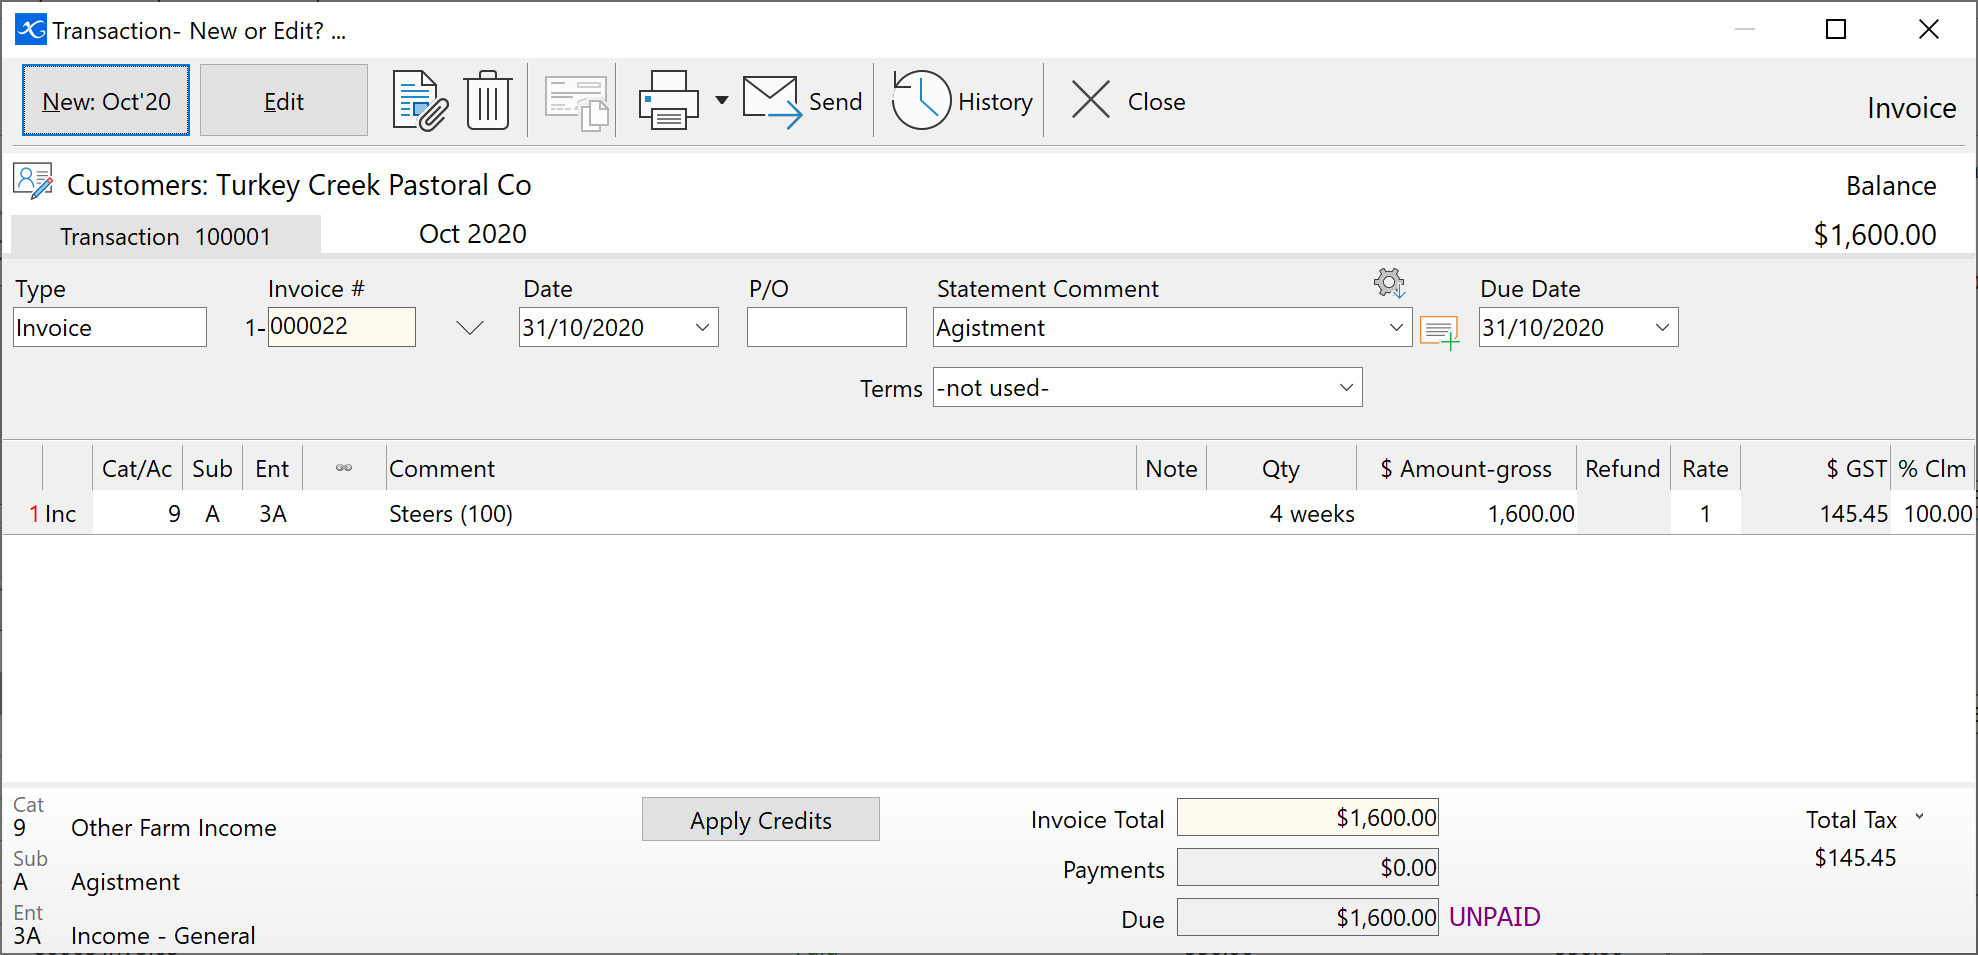
5.Select the Type - Invoice.
6.For “Invoice #” (Invoice Number), Phoenix automatically assigns the invoice number if the book number has been selected in the Card File or Account set up for this customer. If Hand Written is selected in the Card File set up then the invoice number must be entered.
7.Enter the date of the invoice.
8.If the Customer has provided a Purchase Order number, enter this in the P/O field.
9.Enter the Statement Comment. You can manage the selection of comments available by clicking  . See also: Comments History
10.Due Date is set by a combination of the date of the Invoice in conjunction with the Terms set for the Customer. You can manually change this if required. See also: Setup Customer Accounts
11.Enter the Category or Account Transfer. To choose a category either start typing the category name or number or press the F2 key.
12.Enter the sub-category. Either type any letter or press the F2 key to display the sub-categories list.
13.Enter the Enterprise (optional). Either type the number 1 or press the F2 key to display the enterprises.
14.If a link has been set up for this category in Category Setup, a link automatically appears when you enter this field. Check all the data in the field is correct.
15.Enter a Comment.
16.If you want to record more information than will conveniently fit in the comments field, either click or just start typing in the Notes column and add additional text into the box that pops up. You have an extra 256 characters to allow you to tell a small story. Any text that you type here will be searched in any Comments search that you do, and all transaction reports will print these notes if you tick Show Dissection Notes in the Options window in Reports. You can also choose to have these notes shown on the printed invoice by including them on your Invoice layout. See Setup Invoice Layouts.
17.If applicable, enter the Quantity. As you begin typing a pop up screen appears allowing you to enter the quantity, units, and the price per unit.
18.Enter the Amount. An inbuilt calculator can be used in this field - see Amount Field Calculator for more information.
19.Press the Enter key.
20.If there is more than one item in the invoice, keep repeating steps 11 through 19.
21.Press Alt S or click the Save button to save the Invoice.
22.Confirm to print the invoice by clicking Yes or select Email to email the invoice. Select No if you choose not to print or email the invoice. See also: Activity View Print Selection
See also: Enter Customer Payments, Applying Payments to Invoices and Enter Customer Refunds & Credit Notes