The Work Screen is displayed after running Phoenix and selecting your working data folder (your set of books). The Phoenix Work Screen is the control centre from which all facilities of the program are available.
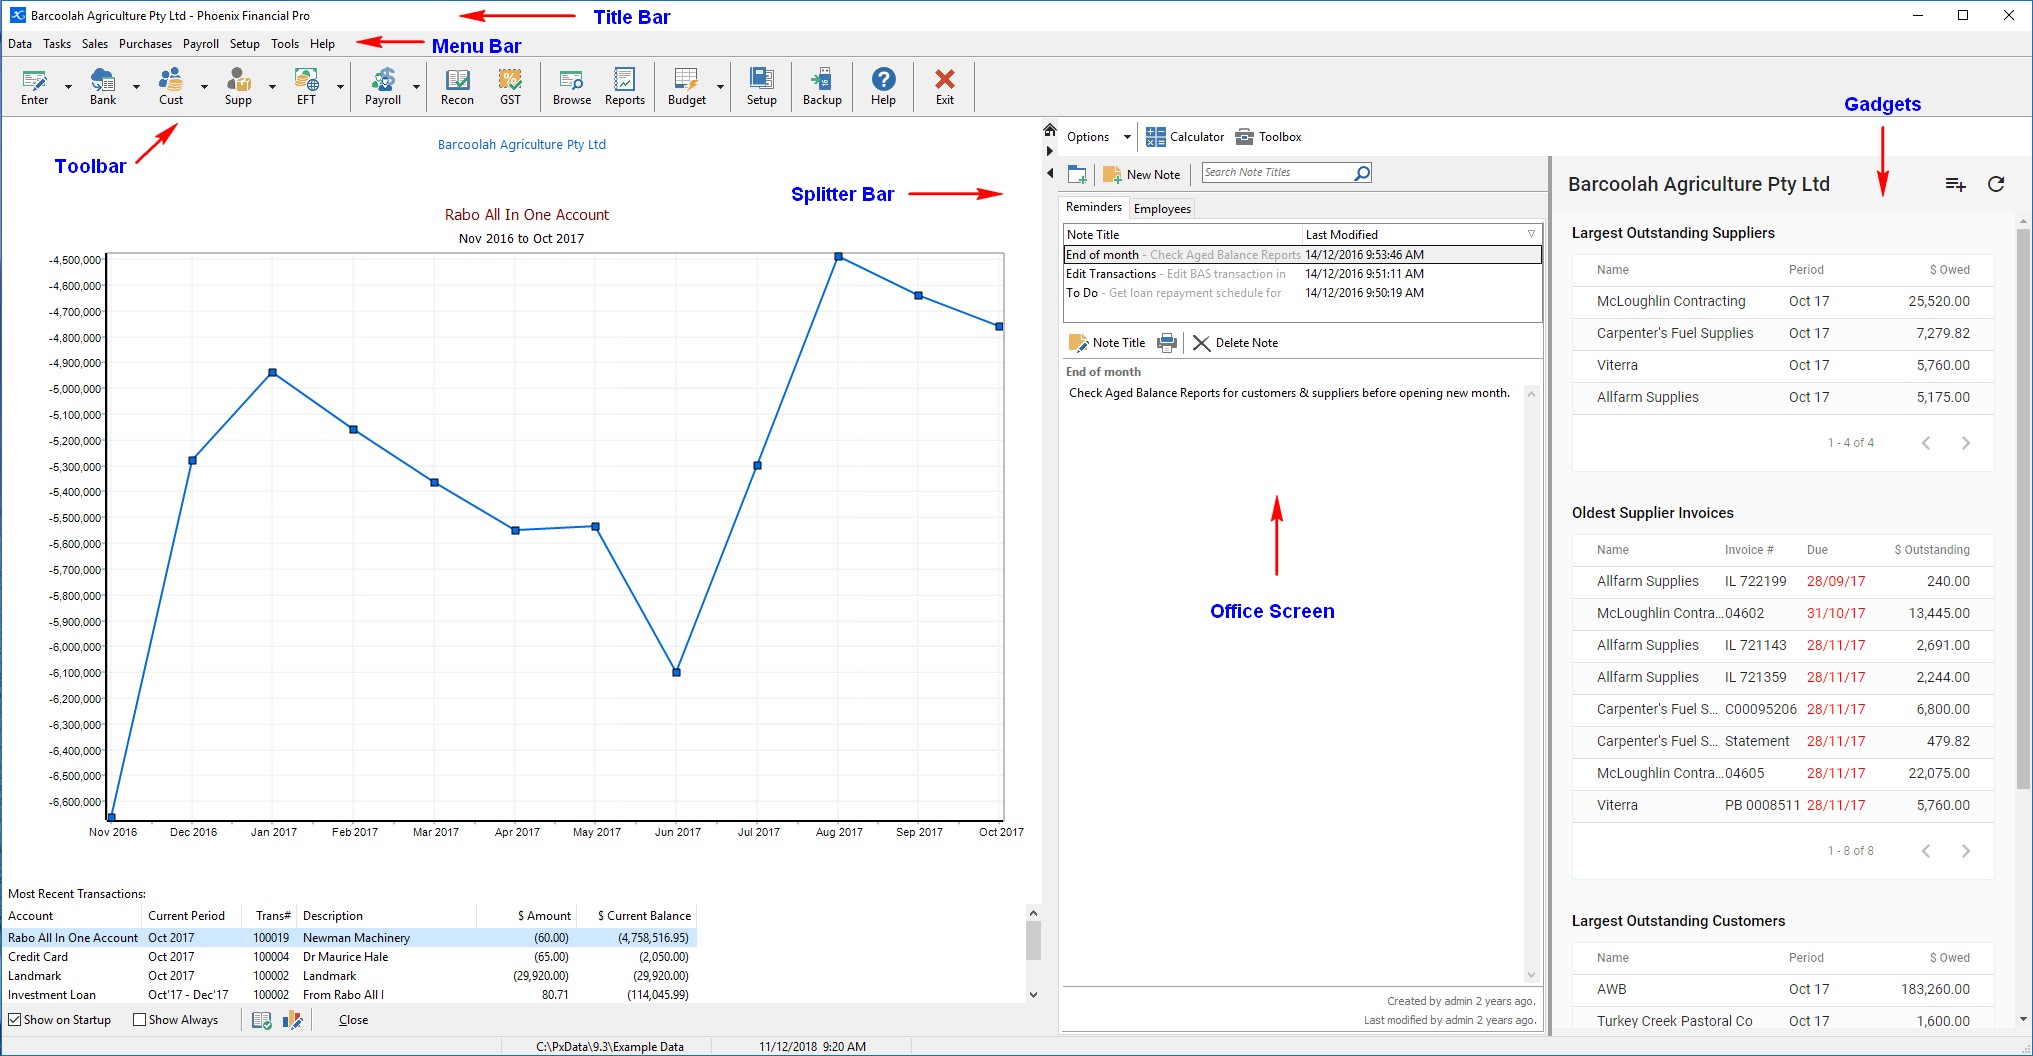
The screen is divided into six main areas:
1.The Title Bar is located at the very top of the screen and displays the name of the Licensed User. If the program has not yet been Activated it displays Unregistered Phoenix. There are three buttons on the left hand side of this bar. The first minimises the Phoenix screen. The next button maximises the Phoenix screen. The last button is the cross which will shut the Phoenix program down.
2.The Menu Bar is located just below the title bar, there are 8 menu options. Select the desired menu by clicking on it with the mouse button.
3.Situated below the pull down menus is the Toolbar. The Toolbar contains the program’s most commonly used options and is designed for quick access to the associated area. All functions available on the Toolbar are also available from the pull down menus. Many functions on the Toolbar and menus are also available using shortcut keys. See Keyboard shortcuts for more information.
4.The area located immediately below the Toolbar is the area upon which all of the working screens will appear. The name of your data set is initially shown in this area. It can be considered to be Phoenix workspace and will be the area where most of your attention will be focused.
5. On the right hand side of the Work Screen is the Office Screen. When the Office button is selected Phoenix gives the option to display a Notepad as well as a Management Dashboard. You can also access a calculator as well as the Toolbox function from this area. When in the Reconciliation task you can also choose to display the Office Screen. The Office Screen can be minimised by dragging the left border of the Office Screen (the Splitter Bar) to the right.
6. Further to the right is the Gadget Screen. Gadgets are a quick history tool and can be configured by the user.