|
Navigation: Financial > Day to Day Tasks > Enter Transactions Reconciled Account Transactions |
Scroll Prev Top Next More |
There are fundamentally two types of transactions in Reconciled accounts:
1.Click the 2.From the Selection bar, select Account to reveal your list of accounts. Choose the account you wish to work with and click OK. 3.Phoenix defaults to the current period. For prior period and next period entries, select Period from the Selection bar to reveal the list of periods available. Highlight your choice and select OK. 4.Click New to begin entering a new transaction.
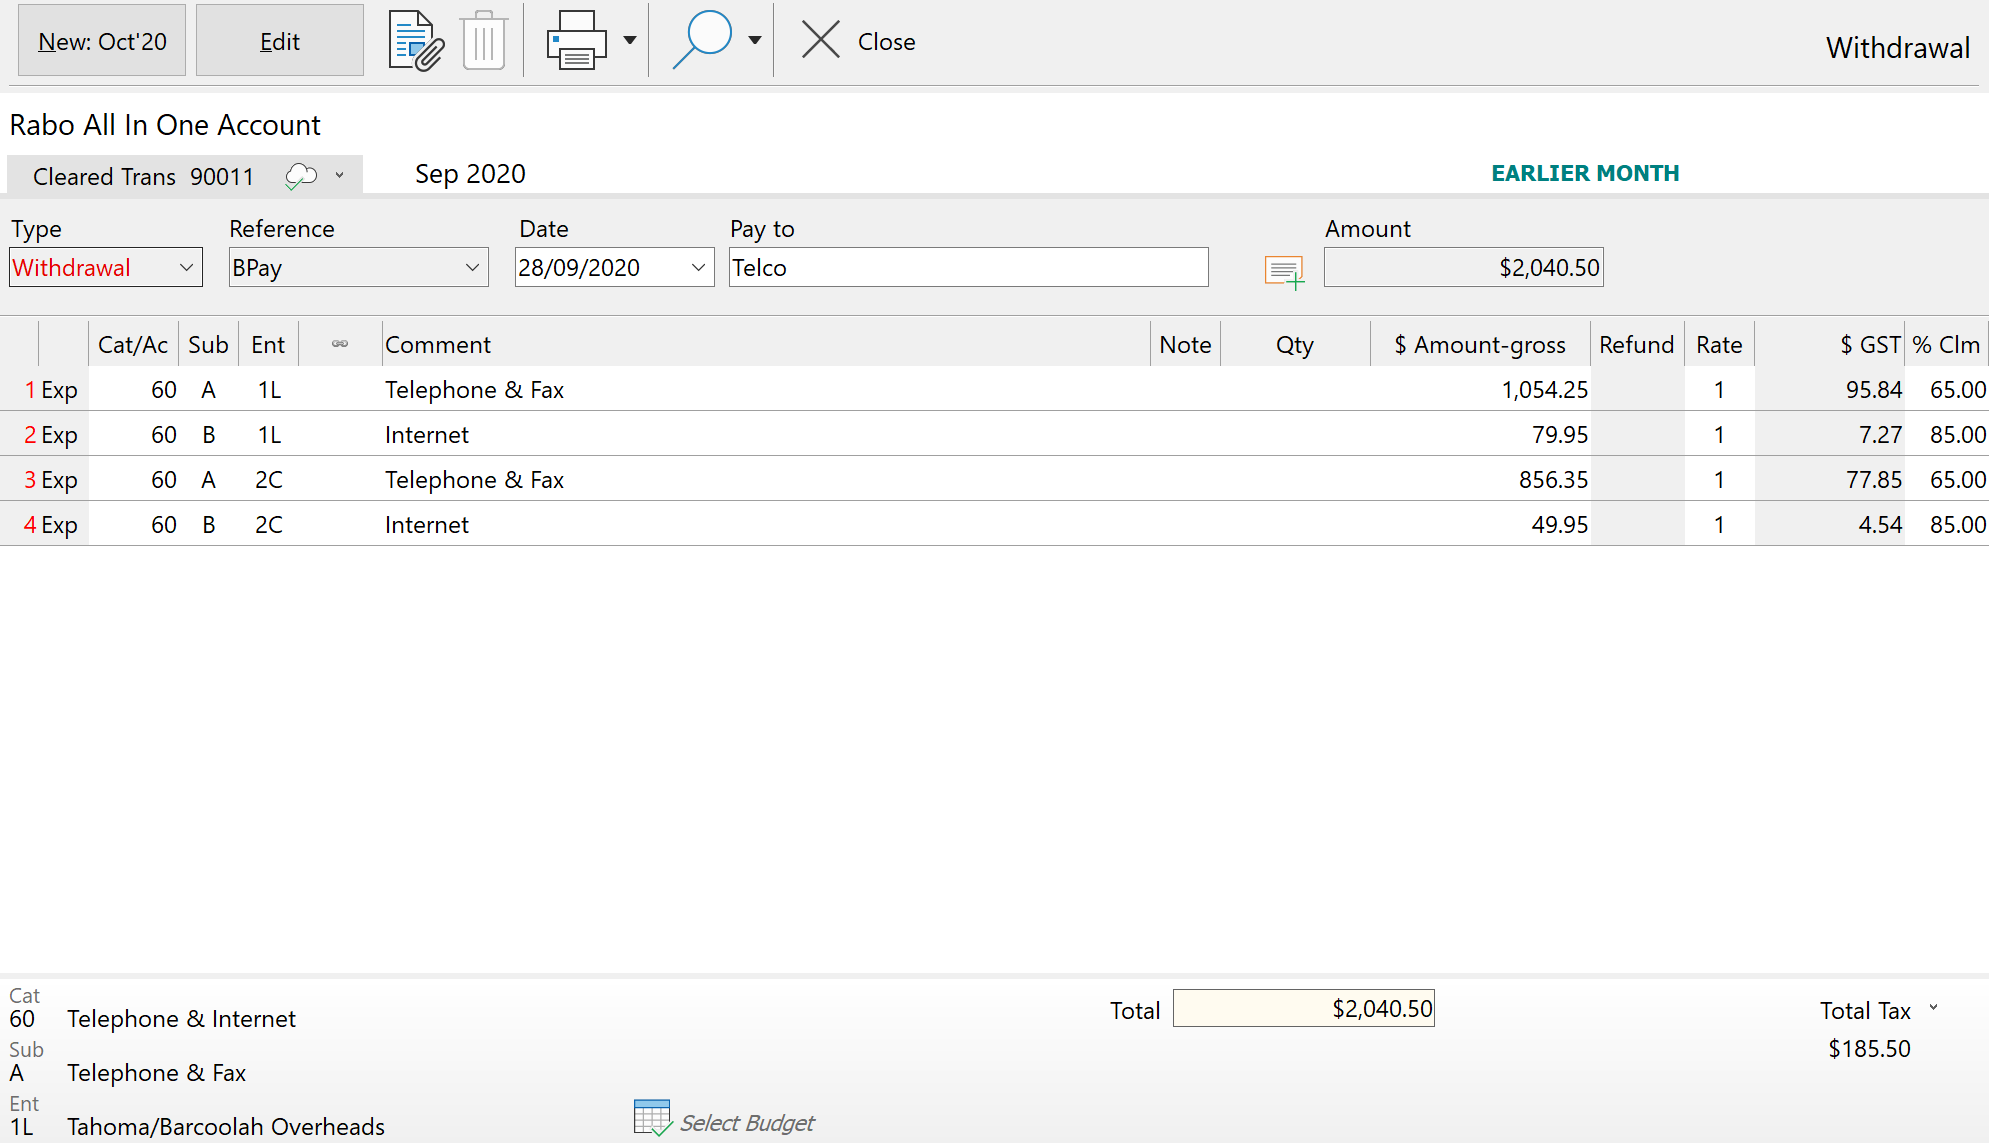
5.Select the Type (for a payment this would be Cheque, Withdrawal or EFT). 6.Enter a reference (e.g. cheque number) – leave blank or enter an asterisk (*) for cheque printing or EFT payments. 7.Enter the date of the payment. 8.Type the name of the Payee in the Pay to Field. Either choose from the list by clicking on the downward arrow or enter a new name. 9.Enter the Amount being paid. An inbuilt calculator can be used in this field - see Amount Field Calculator for more information. 10.Select a Category / Account transfer. To view the list of Categories available, start typing the name or the number of the category or press the F2 (edit) key. 11.Select a sub-category. To view the list of sub-categories type a letter or press the F2 key. 12.Select an Enterprise. To view the enterprise list type the number 1 or press the F2 key. 13.If appropriate enter a link. If the link was set up against the category selected in Category Set Up, a link will automatically appear. Check the account, sub-account and transaction type is correct, enter a reference (this is optional). If the required link is not already set up see Category Set Up, or you can also force a link to another financial account by pressing the F2 key to display the link window, and then select the account. 14.Enter a Comment. See how to access previously used comments. 15.If you want to record more information than will conveniently fit in the comments field, either click or just start typing in the notes column and add additional text into the box that pops up. You have an extra 256 characters to allow you to tell a small story. Any text that you type here will be searched in any Comments search that you do, and all transaction reports will print these notes if you tick Show Dissection Notes in the options window in Reports. 16.Enter in a Qty if applicable. As part of every transaction you now have the opportunity to record a quantity. The family of units that this quantity belongs to will be available for you to choose from whenever this category is used again. You can modify the family of units through Category Setup. See also Filter Measurements 17.Enter in the Amount. Phoenix defaults the amount needed to balance the transaction after each dissection. If GST Tracking is active, clicking on the $ Amt Gross title will change it to $ Amt Net. This allows amounts to be entered including GST ($ Amt Gross) or excluding GST ($ Amt Net). An inbuilt calculator can be used in this field - see Amount Field Calculator for more information. 18.To enter a refund against a category see refunds. 19.If there is more than one item keep repeating steps 10 through 18. 20.Press Alt S, or click the Save button to save the transaction
|
1.Click the Enter button on the Toolbar or Transactions from the Tasks menu or press F4 on the keyboard. 2.From the Selection bar, select Account to reveal your list of accounts. Choose the account you wish to work with and click OK. 3.Phoenix defaults to the current period. For prior period and next period entries, select Period from the Selection bar, to reveal the list of periods available. Highlight your choice and select OK. 4.Click New to begin entering a new transaction.
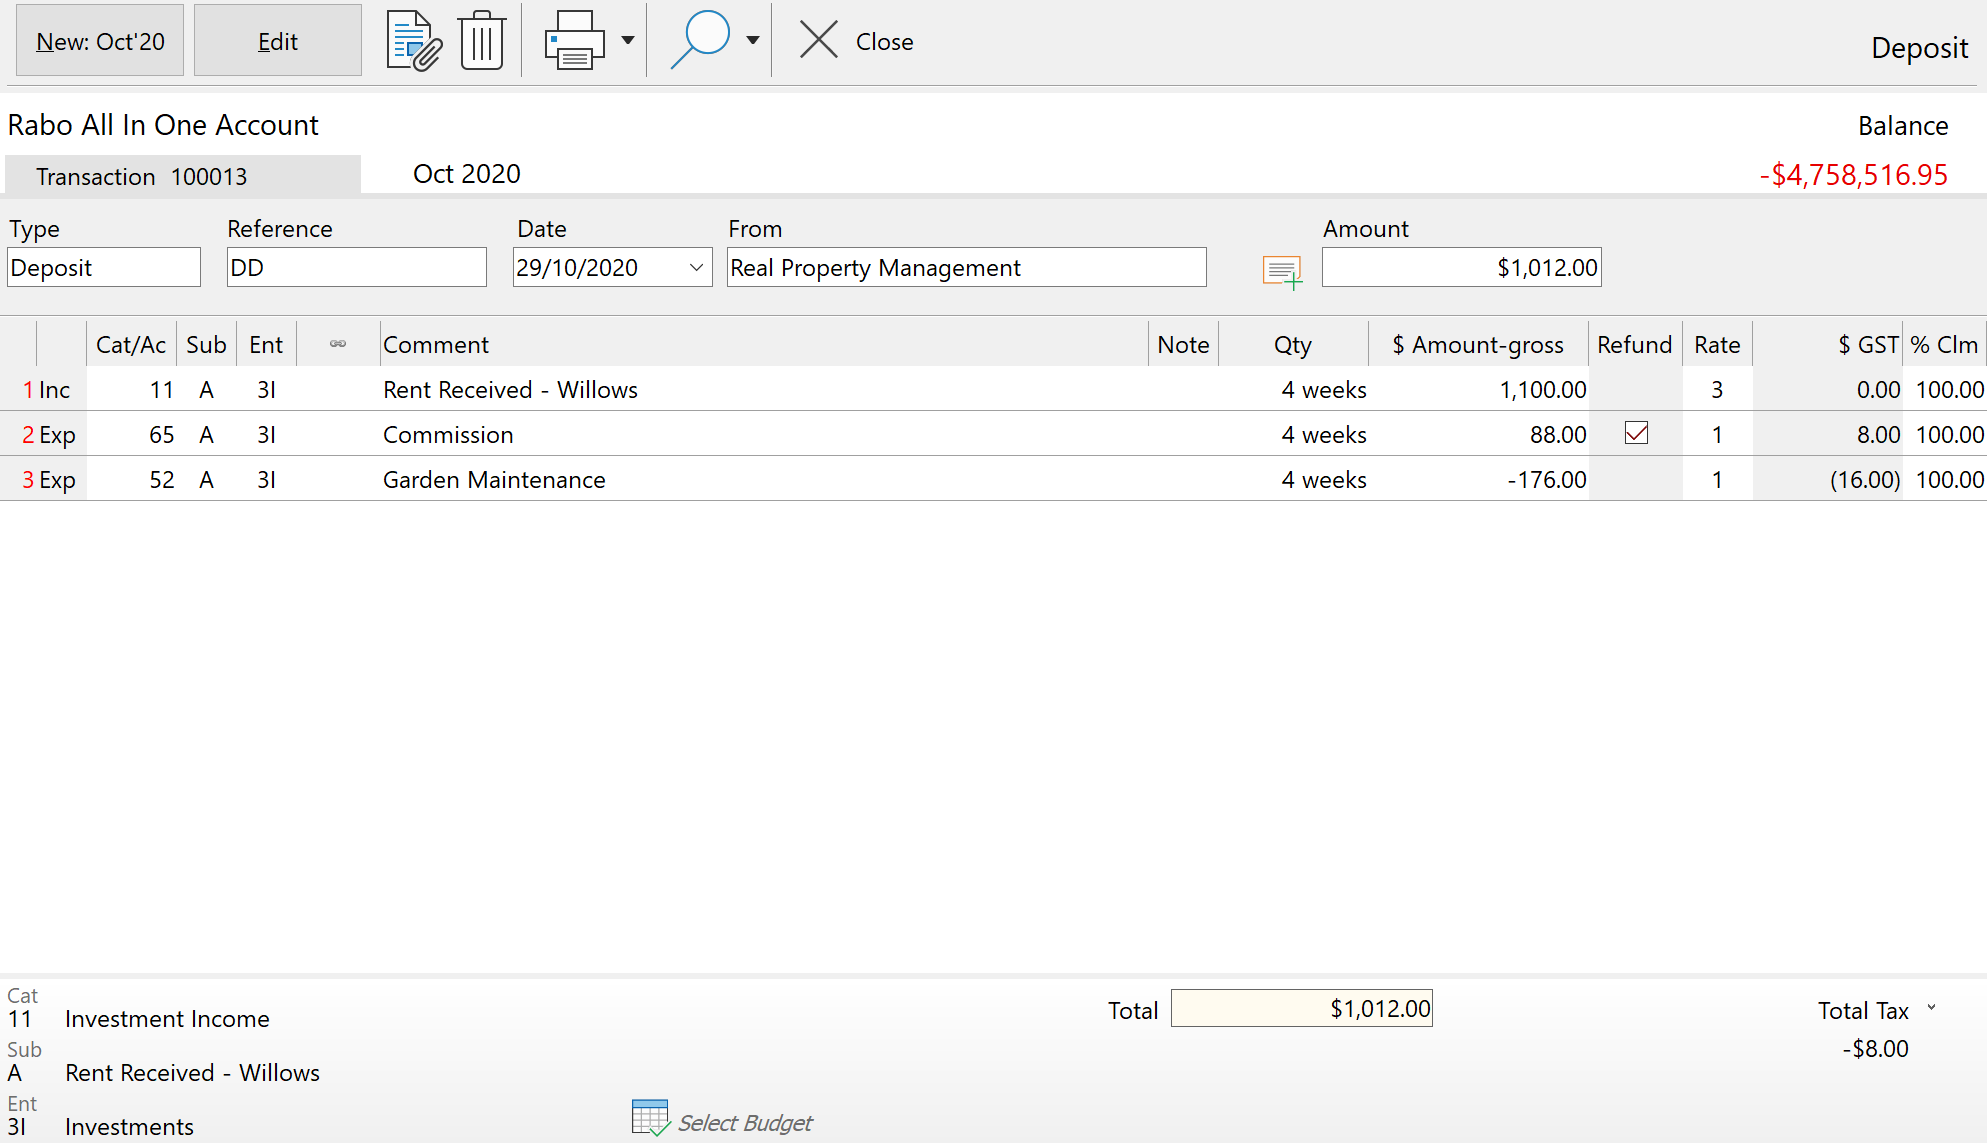
5.Select the Type (deposit). 6.Enter a reference (optional). 7.Enter the date of the receipt. 8.Enter in the From field. Either choose from the list by clicking on the downward arrow or enter a new name. 9.Enter the Amount for the deposit. An inbuilt calculator can be used in this field - see Amount Field Calculator for more information. 10.Select a Category or account transfer. To view the list of Categories start typing the name or the number of the category and the list of categories or press the F2 key. 11.Select a sub-category. To view the sub-category list type a letter or press the F2 key. 12.Select an Enterprise. To view the enterprise list type the number 1 or press the F2 key. 13.If appropriate enter a link. If the link has already been set up against the category in Category Set Up, a link automatically appears. Check the account, sub-account type and transaction type is correct, enter a reference (this is optional). If the required link is not already set up see Category Set Up, you can also force a link to another financial account by pressing the F2 key to display the link window, and then select the account. When linking a dissection to another account you are shown the balance of the destination account as well as the last entry to that account. 14.Enter a Comment. 15.If you want to record more information than will conveniently fit in the comments field, either click or just start typing in the notes column and add additional text into the box that pops up. You have an extra 256 characters to allow you to tell a small story. Any text that you type here will be searched in any Comments search that you do, and all transaction reports will print these notes if you tick Show Dissection Notes in the options window in Reports. 16.Enter in Dissection the Amount. An inbuilt calculator can be used in this field - see Amount Field Calculator for more information. 17.To enter a refund against a category see refunds. 18.If there is more than one item keep repeating steps 10 through 16. 19.Press Alt S, or click the Save button to save the transaction |
See also:
How to Attach an image
How to Schedule Regular Transactions
©2020 AGDATA Holdings Pty Ltd trading as AGDATA Australia


